
What Is a White Spot on Lenovo Laptop Screen? (And Why It Happens)
A white spot on your Lenovo laptop screen is a bright, visible patch of light that appears on your display, and it’s usually fixable. If you’re looking at one right now, don’t panic this isn’t the end of your laptop’s life.
A white spot on your Lenovo laptop screen is a bright visible patch of light that appears somewhere on your display usually about the size of a pinhead to a few millimeters across.
It’s caused by something inside the screen layers, not by a crack or damage to the surface you see.
Here’s what I want you to know right away: this isn’t always a broken pixel. That’s the biggest misconception I see when people first spot this problem.
Most people panic and think their screen is permanently damaged, but in reality, white spots on Lenovo laptops fall into a few different categories, and many of them can actually be fixed.
Is a White Spot the Same as a Dead Pixel?
No, they’re completely different, and understanding this distinction matters because each requires a different fix.
A dead pixel shows up as a tiny black dot that never changes color. It stays black no matter what’s on your screen because the transistor that controls that pixel is burned outA stuck pixel stays frozen on one color usually white, red, green, or blue.
The pixel is still receiving power, but it can’t switch colors properly. A white spot is usually something else entirely.
It’s broader than a single pixel, often caused by dust trapped between the screen layers or by pressure that’s pushed the internal reflective layers together.
Think of it this way: a dead pixel is like a light switch that’s broken and stuck in the off position. A stuck pixel is like a light stuck on one color.
A white spot is often more like a smudge or compression inside the lamp assembly itself.
The good news? Stuck pixels and white spots caused by dust or pressure have decent odds of being fixable. Dead pixels, unfortunately, almost never are.
Why This Happens on Lenovo Laptops
Lenovo laptops aren’t uniquely prone to this problem it happens on Dell, HP, ASUS, and every other brand. But Lenovo users deal with white spots for the same reasons anyone does.
White spots usually come from one of three sources. First, internal debris like dust or moisture gets trapped between the LCD layers during manufacturing or afterward.
Second, pressure damage happens when something pushes too hard on the screen maybe you leaned on the closed laptop or packed it wrong.
Third, a stuck pixel can develop from a manufacturing defect where the LED doesn’t respond correctly to signals.
What I’ve found is that Lenovo screens, like all modern laptop screens, have multiple layers stacked together.
There’s a glass layer with the liquid crystals, diffuser sheets to spread the light evenly, reflective sheets to bounce light from the backlight unit, and the LED backlights themselves.
When dust gets between any of these layers, or when pressure warps one of the plastic sheets, you see that bright white spot because the light gets concentrated instead of diffused evenly.
The positive part of this story? Because these are physical or electrical issues inside the screen assembly, not cracks in the glass you see, there are actually ways to address them.
Will the White Spot Spread or Get Worse?
This is the question that keeps people up at night, and I’m going to give you the reassuring answer: no, it almost certainly won’t.
White spots don’t spread across your screen. Dust spots stay where they are. Stuck pixels don’t propagate to neighboring pixels.
Dead pixels theoretically could spread in very rare cases, but it’s so uncommon that you shouldn’t worry about it. The white spot you’re looking at today will almost certainly be in the exact same spot a month from now, a year from now, even five years from now if you never fix it.
This is purely a cosmetic problem. Your Lenovo laptop will run fine, perform normally, process everything at full speed, and stay just as cool as it always has.
The white spot doesn’t affect your productivity, files, security, or hardware lifespan. I know it’s annoying to look at, but it’s not dangerous and won’t wreck your laptop
You can keep using your Lenovo normally. You don’t need to panic and immediately spend money on repairs. You have time to figure out your options, which is what the rest of this guide is designed to help you do.
What Causes White Spots on Lenovo Laptop Screens? 7 Reasons Explained
Understanding what causes your white spot determines how you’ll fix it. White spots appear on Lenovo screens for different reasons, and some can be resolved at home while others need professional help.
Some causes can be resolved at home, while others require professional help or warranty claims. Let me break down the seven most common culprits I’ve encountered.

1. Dust or Debris Between LCD Layers (Most Common)
In my experience repairing Lenovo screens, this is the most common cause people describe
Dust or moisture gets trapped between the internal layers of your Lenovo screen, usually during manufacturing or when a tiny crack allows particles to slip inside.
Think of your screen like a sandwich. You have the glass layer with liquid crystals, plastic diffuser sheets that spread light, reflective sheets that bounce light from the backlight, and LED backlights.
When dust settles on one of these internal sheets, the light concentrates around that particle instead of spreading evenly, creating the bright white spot you see.
The good news is this cause is fixable. The dust hasn’t damaged anything permanently. If you can access those internal layers and wipe the debris away, the white spot disappears.
The challenge is getting inside without causing additional damage, but it’s definitely possible with the right technique and patience.
2. Pressure Damage from Impact or Compression
Maybe you leaned on your closed Lenovo laptop, packed it too tightly in a bag, or dropped something on the screen. When pressure pushes on the display, it compresses or warps those internal reflective sheets.
The warped plastic no longer spreads light evenly, so you get a bright white spot exactly where the material got bent inward.
Pressure damage creates a distinct white spot in one specific location, so you can usually trace what caused it. Sometimes the deformation is temporary and you can gently massage the sheet back into shape. Other times the plastic gets creased permanently and doesn’t recover.
If your white spot sits directly where your palm rests on the closed laptop or at a corner where something dropped, pressure damage from impact is likely your problem.
3. Stuck or Dead Pixels (Actual LED Malfunction)
Your Lenovo screen contains millions of tiny LEDs that emit red, green, and blue light. When all three colors shine at full brightness simultaneously, they create white light.
A stuck pixel happens when an LED receives power but can’t change its brightness or color properly. It stays locked on white, no matter what image should be displayed.
A dead pixel is different and worse. The transistor controlling that LED has failed completely, so the pixel stays permanently black and receives no power.
The distinction matters because stuck pixels sometimes respond to software tools that flash colors rapidly to reset the LED. Dead pixels almost never can be fixed.
White spots from stuck pixels are usually smaller and more pinpoint than dust spots. If your white spot is about the size of a pin head, stuck pixel is more likely.
If it’s larger and more spread out, dust or pressure damage is probably the cause.
4. Backlight Bleeding or LED Issues
Your Lenovo has a separate backlight unit behind the LCD layer. This backlight contains dozens of tiny LEDs that spread light across your entire screen.
When one of these backlight LEDs starts to fail or gets stuck on, it creates a bright spot from behind the screen.
Backlight bleeding feels different from dust or pixels. The bright spot often glows and might look like light leaking through, especially when you look at the screen from an angle.
The affected area is usually brighter than the surrounding display, not just a spot of discoloration.
This type of problem is harder to fix yourself because it lives in the backlight assembly itself. Accessing the backlight layer inside a Lenovo screen is more complex than removing surface dust.
5. Manufacturing Defects
Sometimes Lenovo screens leave the factory with defects already present. This happens even with brand new laptops fresh from the box.
A pixel might not respond correctly to electrical signals, or dust might have gotten inside during manufacturing before the screen was sealed. These are factory issues, not something you caused.
Manufacturing defects are often covered under warranty. If your Lenovo is within one to two years of purchase and the white spot appeared on a new device, you likely have a legitimate case for warranty coverage. Lenovo has specific policies about defective pixels and screen issues.
6. Liquid Damage or Moisture Exposure
This is the most serious cause on this list. If water or liquid got inside your Lenovo screen, it can damage the internal LED circuitry or cause corrosion on the reflective sheets. Moisture inside creates problems that are usually permanent.
Liquid damage typically shows as multiple discolored spots or a hazy area rather than a single white spot, but isolated damage is possible. If your Lenovo was exposed to spills, high humidity, or moisture, and white spots appeared afterward, liquid damage is worth considering.
This type of damage almost always requires professional repair or screen replacement because the internal components are compromised.
7.Intel Graphics Chip Glitch (Lenovo Specific)
Here’s something unique to certain Lenovo models. If you have a Lenovo with an Intel graphics processor from the 7th to 10th generation, you might experience a white border or bright spot
that appears when your laptop starts up.
This is a known hardware glitch in the Intel UHD 630 graphics chip that’s soldered directly onto the motherboard.
If you’re experiencing other graphics-related display problems on your Lenovo, comprehensive troubleshooting methods cover similar scenarios.
The strange part about this particular issue is that it often fixes itself. The white border looks annoying at first, but after a few hours of using your Lenovo normally, it gradually fades and disappears.
It might return occasionally, but the glitch typically resolves on its own without any action needed from you.
This graphics chip issue is purely a hardware quirk, not something you caused or something that indicates a broken screen. It’s frustrating because it looks concerning, but it usually goes away
with time.
How to Diagnose White Spots: Is It Fixable?
Before you try any fixes, run these quick diagnostic tests to understand what you’re actually dealing with. These five simple steps will tell you whether your white spot is a hardware problem, a software glitch, or something that needs professional help.

Step 1: Observe and Document the White Spot
Look at your Lenovo screen carefully and take a screenshot of the affected area. Note exactly where the white spot appears, how large it is, and how bright it looks.
This documentation matters because it helps you track whether any fixes actually work and gives you proof if you need to contact Lenovo support for warranty help.
Take your screenshot against a plain white background. This makes the spot stand out clearly. If you need to show it to a technician later, you’ll have visual evidence.
Step 2: Try the Graphics Driver Refresh Shortcut
Press Windows + Shift + Ctrl + B all at once. Your screen will flash briefly and the graphics driver will reset. This takes five seconds and fixes software glitches immediately. If your white spot disappears after this shortcut, you had a temporary driver problem, not a hardware issue.
Step 3: Connect an External Monitor (The Definitive Test)
Plug your Lenovo into an external monitor using an HDMI or VGA cable. This is the most important diagnostic step. If the external monitor displays perfectly with no white spot, your physical LCD screen is the problem.
If the external monitor also shows the white spot, the issue is with your graphics driver or motherboard, not the screen hardware.
This single test eliminates half your guesswork about what’s wrong.
Step 4: Take a Screenshot
Open a white document or blank image and take another screenshot. If the white spot appears in the screenshot, it’s a hardware pixel defect.
If the spot doesn’t show in the screenshot, you’re dealing with a display or graphics issue that software might fix.
Step 5: Enter Safe Mode
If your external monitor showed the white spot, restart your Lenovo in Safe Mode by forcing shutdown two or three times.
Navigate to Troubleshoot and Startup Settings. If the spot disappears in Safe Mode, a corrupted driver or application is causing the problem. If it remains, the issue is hardware related.
Stuck Pixel vs. Dead Pixel vs. White Spot: Know What You’re Fixing
Understanding the difference between these three defects saves you hours of wasted effort. They look similar but require completely different fixes, and some cannot be fixed at all no matter what you try.
Dead Pixel: Permanently Black and Unfixable
A dead pixel appears as a tiny black dot that never changes. The transistor controlling that pixel has failed completely, so it receives no power at all. This defect is essentially permanent and almost impossible to fix.
I’ve seen people spend days trying software solutions on dead pixels, but nothing works because the hardware itself is broken.
The good news is dead pixels are rare on Lenovo laptops. If you have one, it’s usually covered under warranty if your laptop is new.
Stuck Pixel: Frozen on One Color (Usually Fixable)
A stuck pixel stays frozen on one color usually white, red, green, or blue. The pixel still receives power but can’t switch colors properly.
A white spot is different altogether. It’s broader than a single pixel and usually comes from dust trapped between screen layers or pressure that pushes the internal reflective layers together
High fixability makes stuck pixels worth trying to repair. Success depends on whether the stuck state is temporary or permanent, but you have legitimate options.
White Spot: Broader Area (Usually Dust or Pressure)
A white spot is different from both pixels. It’s a larger bright patch caused by dust trapped between screen layers, pressure damage, or backlight issues.
This isn’t a single failed pixel but rather something inside the screen assembly affecting how light distributes.
White spots are often fixable through internal cleaning or gentle pressure adjustment.
Quick Test: Screenshot Method
Open a white document and take a screenshot. If the white spot appears in the screenshot, you have a hardware defect. If the spot doesn’t show in the screenshot, a software or graphics driver issue is causing the problem.
How to Fix White Spots on Lenovo: Software Solutions First
Start with software fixes before you even think about opening your Lenovo. These low-risk solutions work about 30 to 40 percent of the time, cost nothing, and take less than an hour.
If your white spot is a stuck pixel, one of these methods might solve it completely.
Fix 1: Use JScreenFix (Free Online Tool)
Visit jscreenfix.com and launch the tool. A box with rapidly flashing colors will appear on your screen. Drag this box directly over your white spot and let it run for at least 15 to 20 minutes.
The rapid color cycling forces stuck pixels to reset and start responding normally again.
Some stubborn spots need an hour or more, so be patient. This method works because it exercises the pixel’s LED with constant color changes, sometimes waking it up after it gets stuck.
Fix 2: Try Dead Pixel Checker App
Search for “Dead Pixel Checker” in the Microsoft Store and install it. This app works the same way as JScreenFix but with a different interface. You can also try the “Pixel Test” app as an alternative.
Fix 3: Update Your Graphics Drivers
Outdated or corrupted graphics drivers cause white spots on Lenovo laptops, especially models with Intel graphics. Open Device Manager, right click your Display Adapter and select Uninstall Device. Windows will automatically reinstall the driver when you restart.
This fixes many software-caused display issues without you doing anything complicated.
Fix 4: Quick Graphics Driver Refresh
Press Windows + Shift + Ctrl + B all at once. Your screen flashes briefly as the graphics driver resets. This 5-second fix solves temporary driver glitches immediately and requires no restart.
Fix 5: Gentle Pressure Technique
Power off your Lenovo completely. Use a soft microfiber cloth and apply very gentle pressure directly on the white spot for one to two minutes.
This can sometimes reset stuck pixels, but be careful. Too much pressure causes additional damage.
Warning: When Software Won’t Help
Software fixes don’t work on dust inside your screen, pressure marks, or backlight issues. If these methods fail after trying them properly, the problem is hardware and requires opening your laptop or professional repair.
Clean Your Screen and Check Connections (Hardware Fixes Without Opening)
Before you consider opening your Lenovo, try these external fixes that don’t require any disassembly. Sometimes what looks like an internal problem is actually just external dust or a display connection issue you can address safely.
Step 1: Clean the Screen Exterior Properly
External dust on your screen can actually look like an internal white spot, especially under certain lighting. Use a microfiber cloth slightly dampened with distilled water and gently wipe the screen surface. Never use Windex, alcohol cleaners, or harsh chemicals because these damage the screen coating.
If you suspect the spot is external dust, cleaning might solve the problem in seconds. Take a screenshot before and after cleaning to compare whether the spot changed.
Step 2: Inspect for Display Cable Looseness
A loose internal display cable occasionally causes visual defects that resemble white spots. You cannot fix a loose cable without opening your Lenovo, but knowing this is the cause tells you that professional repair is necessary.
Look at the edges of your screen frame for any visible gaps or separation. If the screen feels slightly loose or moves when you gently press the bezel, a cable connection issue is possible and worth mentioning to a technician.
Step 3: Try Restarting in Safe Mode
Software problems sometimes mimic hardware defects. Restart your Lenovo in Safe Mode, which disables graphics drivers and third party applications.
If your white spot disappears in Safe Mode, you have a driver or software issue that software fixes can address.
If the spot remains visible in Safe Mode, the problem is definitely hardware related and you need to move forward with hardware solutions or professional help.
How to Repair White Spots Yourself: Internal LCD Layer Cleaning (Advanced)
If software fixes failed and you’re comfortable working with electronics, you can open your Lenovo and clean the internal screen layers yourself.
This is the most detailed repair option and has the highest success rate for dust and pressure mark white spots. I’ll walk you through each phase carefully because precision matters here.
Watch this comprehensive video demonstration showing the actual process of opening a Lenovo laptop and cleaning internal LCD layers to remove white spots.
Video demonstration showing how technicians repair white spots on Lenovo laptop screens by cleaning internal LCD layers.CRITICAL: Safety First Before You Start
Power off your Lenovo completely and remove the battery if possible. This prevents electric shock and motherboard damage from static electricity. Ground yourself by touching a metal part of the laptop chassis before you start working. These precautions take 30 seconds but protect your device and your safety.
Never work on a powered laptop. Moisture from your hands and static electricity can fry components instantly.
Tools You’ll Need (Budget: $15-30)
Gather these items before you start: a thin plastic prying tool or guitar pick, small Phillips screwdriver, microfiber cloth, isopropyl alcohol at 90 percent concentration or higher, a soft work surface like a towel, and proper lighting to see inside the screen assembly.
Don’t use metal tools because they scratch and damage plastic clips. Don’t use regular rubbing alcohol because lower concentrations leave residue.
Phase 1: Removing the Bezel (Plastic Frame)
This is the step where most people make mistakes. Never pry from the outside edges of your screen frame because you’ll snap the plastic clips. Instead, place your fingers on the inside edges near the glass and gently pull outward. You’ll hear snapping sounds as the clips release.
Work slowly around all four sides. If resistance builds up, stop and check what’s catching. Forcing the bezel breaks it permanently.
Phase 2: Disconnecting the LCD Panel
Remove the small screws holding the LCD to your laptop lid. Lift the screen gently and lay it face-down on your keyboard with a protective cloth underneath. Locate the video cable connector and lift the adhesive tape or flip the metal locking bar. Pull the connector out horizontally, not at an angle.
Never force the video cable. Broken connectors mean your screen won’t power on after repair.
Phase 3: Opening the LCD Panel (Accessing Internal Layers)
Your screen is held together by a thin metal frame or silver tape. Carefully peel this back to separate the glass layer from the backlight unit behind it. This step is delicate because the glass is thin and can break if you force it.
Use a thin plastic blade and work slowly around the edges. The backlight unit contains multiple plastic sheets inside, and you need access to identify your white spot.
Phase 4: Identifying the White Spot Inside
Hold the LCD layers up to a bright light source and tilt them to see exactly which layer has the dust or pressure mark. Look for the bright spot and document its location. This tells you which sheet needs cleaning and whether the damage is fixable.
If the spot is from a cracked or shattered internal sheet, cleaning won’t help and you need professional repair.
Phase 5: Cleaning the Internal Sheets
Use your microfiber cloth with a small amount of isopropyl alcohol. Gently wipe the layer containing dust, working slowly and carefully. Avoid touching the sheets with your bare hands because fingerprints become permanent defects once you reassemble.
If the white spot is a pressure mark, gently massage the plastic sheet with your cloth to flatten the warped area. Work patiently for a few minutes. Sometimes the sheet relaxes and the spot disappears.
Phase 6: Reassembling in Perfect Order
Stack the layers back in their exact original order. Any misalignment causes uneven lighting and creates new defects you didn’t have before.
The metal frame must seal properly to hold everything together. This is the most critical step, so patience here pays off.
Take photos as you disassemble to reference the correct layer order during reassembly.
Phase 7: Testing Before Final Assembly
Reconnect the video cable and power on your Lenovo before snapping the bezel back in place. Look at a white background and check if your white spots are completely gone. If the fix worked, proceed with reassembly. If not, you can try again without fully disassembling everything again.
Common Mistakes That Ruin Repairs
Prying the bezel from outside edges breaks clips you can’t replace. Getting fingerprints inside the LCD creates permanent visible marks on your screen.
Leaving dust inside requires complete re-disassembly. Misaligning layers causes uneven brightness across your display. Forcing the video cable breaks the connector and kills your screen completely.
Using harsh cleaning solutions damages the plastic sheets. Rushing the reassembly process causes mistakes you’ll regret. Take your time because speed creates problems you’ll need to fix later.
Success Indicators: How to Know If It Worked
Your white spots disappear completely when looking at a white background. Screen brightness looks even across the entire display with no new dark or bright spots.
Your Lenovo powers on normally and displays properly. The repair succeeded when you see nothing but a clear, perfect screen.
Lenovo ThinkPad & IdeaPad Specific: Model-Specific Repair Tips
Different Lenovo models have slightly different bezel clips and screw placements, so knowing your specific model helps you avoid damaging parts during disassembly. ThinkPad and IdeaPad laptops use different clip designs, and this matters when you’re removing the screen frame.
ThinkPad X240 & X250: Detailed Timeline
ThinkPad X240 and X250 models follow a specific disassembly sequence that works well. Start by removing the bezel carefully from the bottom edge first, then work your way up the sides.
The screws holding the LCD panel are located at the top and bottom of the lid, not on the sides like some other models.
After removing the four screws, lift the screen slowly and lay it face-down on a protective cloth. The video cable is located at the top center of the panel.
Flip the metal locking bar upward before pulling the connector out horizontally. The entire disassembly on a ThinkPad X240 or X250 typically takes about 15 to 20 minutes if you work carefully.
IdeaPad Models (13, 15, 17-inch): Key Differences
IdeaPad bezel clips are positioned slightly differently than ThinkPad models. The clips on IdeaPad screens often sit deeper into the frame, requiring you to pull more firmly during removal. Work your way around the entire frame before pulling too hard on any single spot.
IdeaPad screws are sometimes recessed under rubber pads, so check for these before assuming the screw location.
The video cable connector on IdeaPad models is often on the left side rather than the top center. Check your specific model online before starting.
When to Hire a Professional Instead
If your Lenovo model is uncommon or you’re uncertain about the disassembly process, hiring a professional makes sense.
Lenovo authorized service centers charge between $100 and $200 for screen repairs. This cost includes parts, labor, and a warranty on the work.
Contact your nearest Lenovo service center if you’re uncomfortable with the repair process.
When DIY Fails: Lenovo Warranty & Professional Repair Options
Sometimes professional help makes more sense than DIY, and knowing when to stop trying and call a technician saves you money and frustration. Professional repair protects your Lenovo and guarantees the work, which DIY cannot do.
Signs It’s Time to Call a Professional
What Is a White Spot on Lenovo Laptop Screen? (And Why It Happens)
A white spot on your Lenovo laptop screen is a bright, visible patch of light that appears on your display, and it’s usually fixable. If you’re looking at one right now, don’t panic—this isn’t the end of your laptop’s life.
A white spot on your Lenovo laptop screen is a bright visible patch of light that appears somewhere on your display usually about the size of a pinhead to a few millimeters across. It’s caused by something inside the screen layers, not by a crack or damage to the surface you see.
Here’s what I want you to know right away: this isn’t always a broken pixel. That’s the biggest misconception I see when people first spot this problem.
Most people panic and think their screen is permanently damaged, but in reality, white spots on Lenovo laptops fall into a few different categories, and many of them can actually be fixed.
Is a White Spot the Same as a Dead Pixel?
No, they’re completely different, and understanding this distinction matters because each requires a different fix.
A dead pixel shows up as a tiny black dot that never changes color. It stays black no matter what’s on your screen because the transistor that controls that pixel is burned out .A stuck pixel stays frozen on one color usually white, red, green, or blue.
The pixel is still receiving power, but it can’t switch colors properly. A white spot is usually something else entirely.
It’s broader than a single pixel, often caused by dust trapped between the screen layers or by pressure that’s pushed the internal reflective layers together.
Think of it this way: a dead pixel is like a light switch that’s broken and stuck in the off position. A stuck pixel is like a light stuck on one color.
A white spot is often more like a smudge or compression inside the lamp assembly itself.
The good news? Stuck pixels and white spots caused by dust or pressure have decent odds of being fixable. Dead pixels, unfortunately, almost never are.
Why This Happens on Lenovo Laptops
Lenovo laptops aren’t uniquely prone to this problem it happens on Dell, HP, ASUS, and every other brand. But Lenovo users deal with white spots for the same reasons anyone does.
White spots usually come from one of three sources. First, internal debris like dust or moisture gets trapped between the LCD layers during manufacturing or afterward.
Second, pressure damage happens when something pushes too hard on the screen maybe you leaned on the closed laptop or packed it wrong. Third, a stuck pixel can develop from a manufacturing defect where the LED doesn’t respond correctly to signals.
What I’ve found is that Lenovo screens, like all modern laptop screens, have multiple layers stacked together.
There’s a glass layer with the liquid crystals, diffuser sheets to spread the light evenly, reflective sheets to bounce light from the backlight unit, and the LED backlights themselves.
When dust gets between any of these layers, or when pressure warps one of the plastic sheets, you see that bright white spot because the light gets concentrated instead of diffused evenly.
The positive part of this story? Because these are physical or electrical issues inside the screen assembly, not cracks in the glass you see, there are actually ways to address them.
Will the White Spot Spread or Get Worse?
This is the question that keeps people up at night, and I’m going to give you the reassuring answer: no, it almost certainly won’t.
White spots don’t spread across your screen. Dust spots stay where they are. Stuck pixels don’t propagate to neighboring pixels. Dead pixels theoretically could spread in very rare cases, but it’s so uncommon that you shouldn’t worry about it.
The white spot you’re looking at today will almost certainly be in the exact same spot a month from now, a year from now, even five years from now if you never fix it.
This is purely a cosmetic problem. Your Lenovo laptop will run fine, perform normally, process everything at full speed, and stay just as cool as it always has.
The white spot doesn’t affect your productivity, files, security, or hardware lifespan. I know it’s annoying to look at, but it’s not dangerous and won’t wreck your laptop
You can keep using your Lenovo normally. You don’t need to panic and immediately spend money on repairs. You have time to figure out your options, which is what the rest of this guide is designed to help you do.
What Causes White Spots on Lenovo Laptop Screens? 7 Reasons Explained
Understanding what causes your white spot determines how you’ll fix it. White spots appear on Lenovo screens for different reasons, and some can be resolved at home while others need professional help.
Some causes can be resolved at home, while others require professional help or warranty claims. Let me break down the seven most common culprits I’ve encountered.
1. Dust or Debris Between LCD Layers (Most Common)
In my experience repairing Lenovo screens, this is the most common cause people describe
Dust or moisture gets trapped between the internal layers of your Lenovo screen, usually during manufacturing or when a tiny crack allows particles to slip inside.
Think of your screen like a sandwich. You have the glass layer with liquid crystals, plastic diffuser sheets that spread light, reflective sheets that bounce light from the backlight, and LED backlights.
When dust settles on one of these internal sheets, the light concentrates around that particle instead of spreading evenly, creating the bright white spot you see.
The good news is this cause is fixable. The dust hasn’t damaged anything permanently. If you can access those internal layers and wipe the debris away, the white spot disappears.
The challenge is getting inside without causing additional damage, but it’s definitely possible with the right technique and patience.
2. Pressure Damage from Impact or Compression
Maybe you leaned on your closed Lenovo laptop, packed it too tightly in a bag, or dropped something on the screen. When pressure pushes on the display, it compresses or warps those internal reflective sheets.
The warped plastic no longer spreads light evenly, so you get a bright white spot exactly where the material got bent inward.
Pressure damage creates a distinct white spot in one specific location, so you can usually trace what caused it.
Sometimes the deformation is temporary and you can gently massage the sheet back into shape. Other times the plastic gets creased permanently and doesn’t recover.
If your white spot sits directly where your palm rests on the closed laptop or at a corner where something dropped, pressure damage from impact is likely your problem.
3. Stuck or Dead Pixels (Actual LED Malfunction)
Your Lenovo screen contains millions of tiny LEDs that emit red, green, and blue light. When all three colors shine at full brightness simultaneously, they create white light.
A stuck pixel happens when an LED receives power but can’t change its brightness or color properly. It stays locked on white, no matter what image should be displayed.
A dead pixel is different and worse. The transistor controlling that LED has failed completely, so the pixel stays permanently black and receives no power.
The distinction matters because stuck pixels sometimes respond to software tools that flash colors rapidly to reset the LED. Dead pixels almost never can be fixed.
White spots from stuck pixels are usually smaller and more pinpoint than dust spots. If your white spot is about the size of a pin head, stuck pixel is more likely.
If it’s larger and more spread out, dust or pressure damage is probably the cause.
4. Backlight Bleeding or LED Issues
Your Lenovo has a separate backlight unit behind the LCD layer. This backlight contains dozens of tiny LEDs that spread light across your entire screen.
When one of these backlight LEDs starts to fail or gets stuck on, it creates a bright spot from behind the screen.
Backlight bleeding feels different from dust or pixels. The bright spot often glows and might look like light leaking through, especially when you look at the screen from an angle.
The affected area is usually brighter than the surrounding display, not just a spot of discoloration.
This type of problem is harder to fix yourself because it lives in the backlight assembly itself. Accessing the backlight layer inside a Lenovo screen is more complex than removing surface dust.
5. Manufacturing Defects
Sometimes Lenovo screens leave the factory with defects already present. This happens even with brand new laptops fresh from the box.
A pixel might not respond correctly to electrical signals, or dust might have gotten inside during manufacturing before the screen was sealed. These are factory issues, not something you caused.
Manufacturing defects are often covered under warranty. If your Lenovo is within one to two years of purchase and the white spot appeared on a new device,
you likely have a legitimate case for warranty coverage. Lenovo has specific policies about defective pixels and screen issues.
6. Liquid Damage or Moisture Exposure
This is the most serious cause on this list. If water or liquid got inside your Lenovo screen, it can damage the internal LED circuitry or cause corrosion on the reflective sheets. Moisture inside creates problems that are usually permanent.
Liquid damage typically shows as multiple discolored spots or a hazy area rather than a single white spot, but isolated damage is possible.
If your Lenovo was exposed to spills, high humidity, or moisture, and white spots appeared afterward, liquid damage is worth considering.
This type of damage almost always requires professional repair or screen replacement because the internal components are compromised.
7.Intel Graphics Chip Glitch (Lenovo Specific)
Here’s something unique to certain Lenovo models. If you have a Lenovo with an Intel graphics processor from the 7th to 10th generation, you might experience a white border or bright spot that appears when your laptop starts up.
This is a known hardware glitch in the Intel UHD 630 graphics chip that’s soldered directly onto the motherboard.
The strange part about this particular issue is that it often fixes itself. The white border looks annoying at first, but after a few hours of using your Lenovo normally, it gradually fades and disappears.
It might return occasionally, but the glitch typically resolves on its own without any action needed from you.
This graphics chip issue is purely a hardware quirk, not something you caused or something that indicates a broken screen. It’s frustrating because it looks concerning but it usually goes away with time.
How to Diagnose White Spots: Is It Fixable?
Before you try any fixes, run these quick diagnostic tests to understand what you’re actually dealing with. These five simple steps will tell you whether your white spot is a hardware problem, a software glitch, or something that needs professional help.
Step 1: Observe and Document the White Spot
Look at your Lenovo screen carefully and take a screenshot of the affected area. Note exactly where the white spot appears, how large it is, and how bright it looks.
This documentation matters because it helps you track whether any fixes actually work and gives you proof if you need to contact Lenovo support for warranty help.
Take your screenshot against a plain white background. This makes the spot stand out clearly. If you need to show it to a technician later, you’ll have visual evidence.
Step 2: Try the Graphics Driver Refresh Shortcut
Press Windows + Shift + Ctrl + B all at once. Your screen will flash briefly and the graphics driver will reset. This takes five seconds and fixes software glitches immediately.
If your white spot disappears after this shortcut, you had a temporary driver problem, not a hardware issue.
Step 3: Connect an External Monitor (The Definitive Test)
Plug your Lenovo into an external monitor using an HDMI or VGA cable. This is the most important diagnostic step. If the external monitor displays perfectly with no white spot, your physical LCD screen is the problem.
If the external monitor also shows the white spot, the issue is with your graphics driver or motherboard, not the screen hardware.
This single test eliminates half your guesswork about what’s wrong.
Step 4: Take a Screenshot
Open a white document or blank image and take another screenshot. If the white spot appears in the screenshot, it’s a hardware pixel defect. If the spot doesn’t show in the screenshot, you’re dealing with a display or graphics issue that software might fix.
Step 5: Enter Safe Mode
If your external monitor showed the white spot, restart your Lenovo in Safe Mode by forcing shutdown two or three times. Navigate to Troubleshoot and Startup Settings. If the spot disappears in Safe Mode, a corrupted driver or application is causing the problem. If it remains, the issue is hardware related.
Stuck Pixel vs. Dead Pixel vs. White Spot: Know What You’re Fixing
Understanding the difference between these three defects saves you hours of wasted effort. They look similar but require completely different fixes, and some cannot be fixed at all no matter what you try.
Dead Pixel: Permanently Black and Unfixable
A dead pixel appears as a tiny black dot that never changes. The transistor controlling that pixel has failed completely, so it receives no power at all. This defect is essentially permanent and almost impossible to fix.
I’ve seen people spend days trying software solutions on dead pixels, but nothing works because the hardware itself is broken.
The good news is dead pixels are rare on Lenovo laptops. If you have one, it’s usually covered under warranty if your laptop is new.
Stuck Pixel: Frozen on One Color (Usually Fixable)
A stuck pixel stays frozen on one color usually white, red, green, or blue. The pixel still receives power but can’t switch colors properly.
A white spot is different altogether. It’s broader than a single pixel and usually comes from dust trapped between screen layers or pressure that pushes the internal reflective layers together
High fixability makes stuck pixels worth trying to repair. Success depends on whether the stuck state is temporary or permanent, but you have legitimate options.
White Spot: Broader Area (Usually Dust or Pressure)
A white spot is different from both pixels. It’s a larger bright patch caused by dust trapped between screen layers, pressure damage, or backlight issues.
This isn’t a single failed pixel but rather something inside the screen assembly affecting how light distributes.
White spots are often fixable through internal cleaning or gentle pressure adjustment.
Quick Test: Screenshot Method
Open a white document and take a screenshot. If the white spot appears in the screenshot, you have a hardware defect. If the spot doesn’t show in the screenshot, a software or graphics driver issue is causing the problem.
How to Fix White Spots on Lenovo: Software Solutions First
Start with software fixes before you even think about opening your Lenovo. These low-risk solutions work about 30 to 40 percent of the time, cost nothing, and take less than an hour. If your white spot is a stuck pixel, one of these methods might solve it completely.
Fix 1: Use JScreenFix (Free Online Tool)
Visit jscreenfix.com and launch the tool. A box with rapidly flashing colors will appear on your screen. Drag this box directly over your white spot and let it run for at least 15 to 20 minutes. The rapid color cycling forces stuck pixels to reset and start responding normally again.
Some stubborn spots need an hour or more, so be patient. This method works because it exercises the pixel’s LED with constant color changes, sometimes waking it up after it gets stuck.
Fix 2: Try Dead Pixel Checker App
Search for “Dead Pixel Checker” in the Microsoft Store and install it. This app works the same way as JScreenFix but with a different interface. You can also try the “Pixel Test” app as an alternative.
Fix 3: Update Your Graphics Drivers
Outdated or corrupted graphics drivers cause white spots on Lenovo laptops, especially models with Intel graphics. Open Device Manager, right-click your Display Adapter, and select Uninstall Device. Windows will automatically reinstall the driver when you restart.
This fixes many software-caused display issues without you doing anything complicated.
Fix 4: Quick Graphics Driver Refresh
Press Windows + Shift + Ctrl + B all at once. Your screen flashes briefly as the graphics driver resets. This 5-second fix solves temporary driver glitches immediately and requires no restart.
Fix 5: Gentle Pressure Technique
Power off your Lenovo completely. Use a soft microfiber cloth and apply very gentle pressure directly on the white spot for one to two minutes. This can sometimes reset stuck pixels, but be careful. Too much pressure causes additional damage.
Warning: When Software Won’t Help
Software fixes don’t work on dust inside your screen, pressure marks, or backlight issues. If these methods fail after trying them properly, the problem is hardware and requires opening your laptop or professional repair.
Clean Your Screen and Check Connections (Hardware Fixes Without Opening)
Before you consider opening your Lenovo, try these external fixes that don’t require any disassembly. Sometimes what looks like an internal problem is actually just external dust or a display connection issue you can address safely.
Step 1: Clean the Screen Exterior Properly
External dust on your screen can actually look like an internal white spot, especially under certain lighting. Use a microfiber cloth slightly dampened with distilled water and gently wipe the screen surface. Never use Windex, alcohol cleaners, or harsh chemicals because these damage the screen coating.
If you suspect the spot is external dust, cleaning might solve the problem in seconds. Take a screenshot before and after cleaning to compare whether the spot changed.
Step 2: Inspect for Display Cable Looseness
A loose internal display cable occasionally causes visual defects that resemble white spots. You cannot fix a loose cable without opening your Lenovo, but knowing this is the cause tells you that professional repair is necessary.
Look at the edges of your screen frame for any visible gaps or separation. If the screen feels slightly loose or moves when you gently press the bezel, a cable connection issue is possible and worth mentioning to a technician.
Step 3: Try Restarting in Safe Mode
Software problems sometimes mimic hardware defects. Restart your Lenovo in Safe Mode, which disables graphics drivers and third-party applications. If your white spot disappears in Safe Mode, you have a driver or software issue that software fixes can address.
If the spot remains visible in Safe Mode, the problem is definitely hardware related and you need to move forward with hardware solutions or professional help.
How to Repair White Spots Yourself: Internal LCD Layer Cleaning (Advanced)
If software fixes failed and you’re comfortable working with electronics, you can open your Lenovo and clean the internal screen layers yourself.
This is the most detailed repair option and has the highest success rate for dust and pressure mark white spots. I’ll walk you through each phase carefully because precision matters here.
CRITICAL: Safety First Before You Start
Power off your Lenovo completely and remove the battery if possible. This prevents electric shock and motherboard damage from static electricity.
Ground yourself by touching a metal part of the laptop chassis before you start working. These precautions take 30 seconds but protect your device and your safety.
Never work on a powered laptop. Moisture from your hands and static electricity can fry components instantly.
Tools You’ll Need (Budget: $15-30)
Gather these items before you start: a thin plastic prying tool or guitar pick, small Phillips screwdriver, microfiber cloth, isopropyl alcohol at 90 percent concentration or higher, a soft work surface like a towel, and proper lighting to see inside the screen assembly.
Don’t use metal tools because they scratch and damage plastic clips. Don’t use regular rubbing alcohol because lower concentrations leave residue.
Phase 1: Removing the Bezel (Plastic Frame)
This is the step where most people make mistakes. Never pry from the outside edges of your screen frame because you’ll snap the plastic clips. Instead, place your fingers on the inside edges near the glass and gently pull outward. You’ll hear snapping sounds as the clips release.
Work slowly around all four sides. If resistance builds up, stop and check what’s catching. Forcing the bezel breaks it permanently.
Phase 2: Disconnecting the LCD Panel
Remove the small screws holding the LCD to your laptop lid. Lift the screen gently and lay it face-down on your keyboard with a protective cloth underneath. Locate the video cable connector and lift the adhesive tape or flip the metal locking bar. Pull the connector out horizontally, not at an angle.
Never force the video cable. Broken connectors mean your screen won’t power on after repair.
Phase 3: Opening the LCD Panel (Accessing Internal Layers)
Your screen is held together by a thin metal frame or silver tape. Carefully peel this back to separate the glass layer from the backlight unit behind it. This step is delicate because the glass is thin and can break if you force it.
Use a thin plastic blade and work slowly around the edges. The backlight unit contains multiple plastic sheets inside, and you need access to identify your white spot.
Phase 4: Identifying the White Spot Inside
Hold the LCD layers up to a bright light source and tilt them to see exactly which layer has the dust or pressure mark. Look for the bright spot and document its location. This tells you which sheet needs cleaning and whether the damage is fixable.
If the spot is from a cracked or shattered internal sheet, cleaning won’t help and you need professional repair.
Phase 5: Cleaning the Internal Sheets
Use your microfiber cloth with a small amount of isopropyl alcohol. Gently wipe the layer containing dust, working slowly and carefully. Avoid touching the sheets with your bare hands because fingerprints become permanent defects once you reassemble.
If the white spot is a pressure mark, gently massage the plastic sheet with your cloth to flatten the warped area. Work patiently for a few minutes. Sometimes the sheet relaxes and the spot disappears.
Phase 6: Reassembling in Perfect Order
Stack the layers back in their exact original order. Any misalignment causes uneven lighting and creates new defects you didn’t have before. The metal frame must seal properly to hold everything together. This is the most critical step, so patience here pays off.
Take photos as you disassemble to reference the correct layer order during reassembly.
Phase 7: Testing Before Final Assembly
Reconnect the video cable and power on your Lenovo before snapping the bezel back in place. Look at a white background and check if your white spots are completely gone. If the fix worked, proceed with reassembly. If not, you can try again without fully disassembling everything again.
Common Mistakes That Ruin Repairs
Prying the bezel from outside edges breaks clips you can’t replace. Getting fingerprints inside the LCD creates permanent visible marks on your screen.
Leaving dust inside requires complete re disassembly. Misaligning layers causes uneven brightness across your display. Forcing the video cable breaks the connector and kills your screen completely.
Using harsh cleaning solutions damages the plastic sheets. Rushing the reassembly process causes mistakes you’ll regret. Take your time because speed creates problems you’ll need to fix later.
Success Indicators: How to Know If It Worked
Your white spots disappear completely when looking at a white background. Screen brightness looks even across the entire display with no new dark or bright spots. Your Lenovo powers on normally and displays properly. The repair succeeded when you see nothing but a clear, perfect screen.
Lenovo ThinkPad & IdeaPad Specific: Model-Specific Repair Tips
Different Lenovo models have slightly different bezel clips and screw placements, so knowing your specific model helps you avoid damaging parts during disassembly. ThinkPad and IdeaPad laptops use different clip designs, and this matters when you’re removing the screen frame.
ThinkPad X240 & X250: Detailed Timeline
ThinkPad X240 and X250 models follow a specific disassembly sequence that works well. Start by removing the bezel carefully from the bottom edge first, then work your way up the sides.
The screws holding the LCD panel are located at the top and bottom of the lid, not on the sides like some other models.
After removing the four screws, lift the screen slowly and lay it face-down on a protective cloth. The video cable is located at the top center of the panel.
Flip the metal locking bar upward before pulling the connector out horizontally. The entire disassembly on a ThinkPad X240 or X250 typically takes about 15 to 20 minutes if you work carefully.
IdeaPad Models (13, 15, 17-inch): Key Differences
IdeaPad bezel clips are positioned slightly differently than ThinkPad models. The clips on IdeaPad screens often sit deeper into the frame, requiring you to pull more firmly during removal. Work your way around the entire frame before pulling too hard on any single spot.
IdeaPad screws are sometimes recessed under rubber pads, so check for these before assuming the screw location.
The video cable connector on IdeaPad models is often on the left side rather than the top center. Check your specific model online before starting.
When to Hire a Professional Instead
If your Lenovo model is uncommon or you’re uncertain about the disassembly process, hiring a professional makes sense. Lenovo authorized service centers charge between $100 and $200 for screen repairs. This cost includes parts, labor, and a warranty on the work.
Contact your nearest Lenovo service center if you’re uncomfortable with the repair process.
When DIY Fails: Lenovo Warranty & Professional Repair Options
Sometimes professional help makes more sense than DIY, and knowing when to stop trying and call a technician saves you money and frustration. Professional repair protects your Lenovo and guarantees the work, which DIY cannot do.
Signs It’s Time to Call a Professional
Stop the DIY attempt if you see multiple white spots across your screen because this indicates serious LCD damage. If you’ve already tried all the software fixes and they didn’t work, moving to professional repair is your next logical step.
If you’re uncomfortable opening electronics, honestly assess whether the risk of damage is worth the potential savings.
Call a professional immediately if your screen is cracked, if you suspect liquid damage inside, or if you notice corrosion on any components.
These scenarios mirror similar display problems that often
appear unfixable through DIY methods, making professional intervention the safest choice. Professional technicians have the tools and expertise to handle damage that DIY methods cannot fix.
Does Lenovo Warranty Cover White Spots?
Manufacturing defects on Lenovo laptops are typically covered under warranty for one to two years from purchase. This includes stuck pixels, dead pixels, and manufacturing related white spots.
Accidental damage like pressure marks or drops is usually not covered unless your Lenovo has accidental damage protection.
Check your specific warranty documentation because coverage varies by model and purchase date. If your Lenovo is new and shows white spots, you have a strong case for warranty coverage with no cost to you.
How to File a Lenovo Warranty Claim
Contact Lenovo support through their website, phone, or a local service center. Describe your white spot problem clearly and provide photos if possible.
Give your laptop’s serial number and proof of purchase, which could be your receipt or order confirmation email.
Lenovo determines whether your case qualifies for coverage within a few business days. If approved, they arrange repair or replacement at no cost. The entire process typically takes two to four weeks from start to finish.
Find a Lenovo Service Center
Visit Lenovo’s official support website and use their service center locator to find authorized repair shops near you. You can also call Lenovo support directly to get the nearest service center location. Professional screen replacement costs between $100 and $200 if you’re paying out of pocket without warranty coverage.
Authorized Lenovo service centers use genuine parts and warranty their work, which gives you peace of mind. Lenovo’s warranty coverage details and claim process can be found directly through their support portal, ensuring you get accurate information specific to your laptop model.
Screen Replacement: Cost-Benefit and When It’s Necessary
Screen replacement is your last resort after all other fixes fail. When a white spot cannot be cleaned, software cannot fix it, and professional repair costs more than replacement, buying a new screen makes financial sense.
Cost: How Much Will a New Screen Cost?
A replacement screen for your Lenovo typically costs between $80 and $150 depending on your model. Professional installation adds another $50 to $100 to the total. Your complete out-of-pocket expense ranges from $150 to $250 if warranty does not cover the repair.
Check if your warranty covers screen replacement before paying anything.
Finding the Correct Replacement Screen
Finding the right screen is critical because ordering the wrong model wastes money. Look at the label on the back of your screen for the exact model number. Search this exact model number on Amazon or eBay to find compatible replacements.
Send the seller a photo of your screen label to confirm the part matches your Lenovo exactly. Do not guess or estimate. Incorrect screen orders cannot be returned.
Installation Process (DIY or Professional)
DIY installation is possible if you’re comfortable with disassembly. The process mirrors your internal cleaning repair but you install a new screen instead of cleaning existing layers. Professional installation guarantees compatibility and includes testing before you leave.
Most people choose professional installation because technicians ensure everything works properly.
How to Prevent White Spots on Your Lenovo Laptop (Future Proofing)
Preventing white spots is easier than fixing them, so taking care of your Lenovo now saves you money and frustration later. Simple habits protect your screen and extend its lifespan significantly.
Handle Your Laptop with Care
Never place heavy objects on your closed Lenovo or lean on the screen. Pressure damage causes white spots that are difficult to repair. Use a padded laptop bag when traveling, and keep your Lenovo away from situations where something might press against the screen.
When you’re working at a desk, give your screen space and avoid resting your wrists or hands on the display area.
Clean Your Screen Regularly (The Right Way)
Clean your Lenovo screen once a week with a microfiber cloth and distilled water. Never use Windex or alcohol-based cleaners because these damage the screen coating. Gentle pressure only, no scrubbing or rubbing hard.
Regular cleaning prevents dust buildup on the exterior and keeps your screen clear without creating new problems.
Store Your Laptop Safely
Keep your Lenovo in a cool, dry place when not using it. Extreme heat, cold, and humidity cause moisture to enter the screen, creating internal white spots. Always store your laptop in a protective case and never leave it open on soft surfaces like beds or couches.
Soft surfaces block air vents, causing overheating that damages internal components.
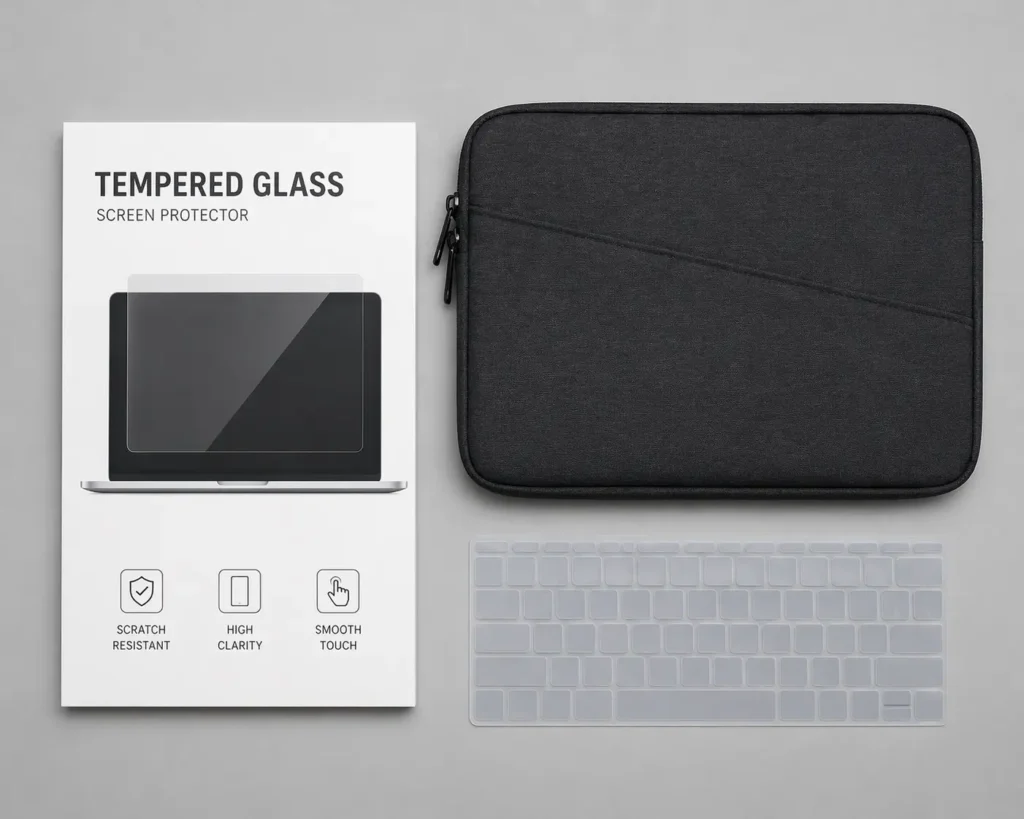
Protective Measures (Screen Protectors, Cases)
Tempered glass screen protectors add an extra layer of defense against accidental impact. A quality laptop case absorbs drops and prevents pressure damage during transport. A keyboard cover prevents accidental liquid spills and dust accumulation.
Budget $20 to $50 for all three protective items combined.
Will a white spot spread or get worse over time?
No, white spots typically don’t spread. Dust spots stay in one place. Stuck pixels don’t propagate to other pixels. Dead pixels can theoretically spread, but this is extremely rare. You can safely use your Lenovo laptop indefinitely with a white spot present without worrying about it getting worse.
Is it safe to keep using my laptop with a white spot?
Yes, completely safe. White spots are purely cosmetic and don’t affect your laptop’s performance, temperature, processing speed, or functionality. Your Lenovo will run exactly the same whether the white spot is there or not. You can continue using your laptop normally without any risk.
Can software really fix white spots?
Software fixes only work if your white spot is a stuck pixel. JScreenFix and similar tools have about a 40 percent success rate for stuck pixels. If your white spot is caused by dust between screen layers or pressure damage, software cannot fix it. You’ll need internal cleaning or professional repair for those cases.
How long will repairs take?
DIY internal cleaning takes one to two hours if you work carefully. Professional service typically takes two to four weeks from drop-off to pickup. Software fixes like JScreenFix take 20 minutes to over an hour depending on the stubborn nature of the stuck pixel. Professional screen replacement usually takes one to three days.
What’s the difference between a white spot and a dead pixel?
A dead pixel appears as a single black dot caused by a broken transistor and cannot be fixed. A white spot is a bright white patch usually caused by dust, pressure damage, or a stuck pixel and is often fixable. Take a screenshot to tell the difference. If the spot appears in the screenshot, it’s a pixel issue. If not, it’s a display issue.
Final Thoughts: Your White Spot Is Probably Fixable
White spots on Lenovo laptop screens are common, usually fixable, and definitely not a reason to panic or replace your entire laptop. You now have complete knowledge to make an informed decision about your next steps.
Here are your three action paths based on your comfort level:
If you prefer the cautious approach: Start with JScreenFix for free. This takes 20 minutes and works for stuck pixels. Update your graphics drivers next. If either method works, you’re done with zero cost.
If you’re moderately comfortable with electronics: Follow the detailed internal cleaning guide in Section 7. This approach works best if your white spot is dust related. The process takes two to three hours but saves you $150 or more in professional repair costs.
If you’re unsure or uncomfortable: Contact Lenovo support first and check your warranty status. If your laptop is still covered, you pay nothing for the repair. If not covered, get a professional repair quote before deciding. Peace of mind is worth the professional cost.
The white spot on your Lenovo laptop screen doesn’t define your laptop’s lifespan. Most white spots are fixable with the right approach, and all of them are preventable with proper care moving forward.
Check your warranty first, contact Lenovo support if you’re unsure about coverage, and don’t let a small cosmetic issue ruin an otherwise perfectly good laptop.
Does Lenovo Warranty Cover White Spots?
Manufacturing defects on Lenovo laptops are typically covered under warranty for one to two years from purchase. This includes stuck pixels, dead pixels, and manufacturing-related white spots. Accidental damage like pressure marks or drops is usually not covered unless your Lenovo has accidental damage protection.
Check your specific warranty documentation because coverage varies by model and purchase date. If your Lenovo is new and shows white spots, you have a strong case for warranty coverage with no cost to you.
How to File a Lenovo Warranty Claim
Contact Lenovo support through their website, phone, or a local service center. Describe your white spot problem clearly and provide photos if possible.
Give your laptop’s serial number and proof of purchase, which could be your receipt or order confirmation email.
Lenovo determines whether your case qualifies for coverage within a few business days. If approved, they arrange repair or replacement at no cost. The entire process typically takes two to four weeks from start to finish.
Find a Lenovo Service Center
Visit support.lenovo.com and use their service center locator to find authorized repair shops near you. You can also call Lenovo support directly to get the nearest service center location.
Professional screen replacement costs between $100 and $200 if you’re paying out of pocket without warranty coverage.
Authorized Lenovo service centers use genuine parts and warranty their work, which gives you peace of mind.
Screen Replacement: Cost-Benefit and When It’s Necessary
Screen replacement is your last resort after all other fixes fail. When a white spot cannot be cleaned, software cannot fix it, and professional repair costs more than replacement, buying a new screen makes financial sense.
Cost: How Much Will a New Screen Cost?
A replacement screen for your Lenovo typically costs between $80 and $150 depending on your model. Professional installation adds another $50 to $100 to the total. Your complete out-of-pocket expense ranges from $150 to $250 if warranty does not cover the repair.
Check if your warranty covers screen replacement before paying anything.
Finding the Correct Replacement Screen
Finding the right screen is critical because ordering the wrong model wastes money. Look at the label on the back of your screen for the exact model number.
Search this exact model number on Amazon or eBay to find compatible replacements.
Send the seller a photo of your screen label to confirm the part matches your Lenovo exactly. Do not guess or estimate. Incorrect screen orders cannot be returned.
Installation Process (DIY or Professional)
DIY installation is possible if you’re comfortable with disassembly. The process mirrors your internal cleaning repair but you install a new screen instead of cleaning existing layers.
Professional installation guarantees compatibility and includes testing before you leave.
Most people choose professional installation because technicians ensure everything works properly.
How to Prevent White Spots on Your Lenovo Laptop (Future Proofing)
Preventing white spots is easier than fixing them, so taking care of your Lenovo now saves you money and frustration later. Simple habits protect your screen and extend its lifespan significantly.
Handle Your Laptop with Care
Never place heavy objects on your closed Lenovo or lean on the screen. Pressure damage causes white spots that are difficult to repair. Use a padded laptop bag when traveling and keep your Lenovo away from situations where something might press against the screen.
When you’re working at a desk, give your screen space and avoid resting your wrists or hands on the display area.
Clean Your Screen Regularly (The Right Way)
Clean your Lenovo screen once a week with a microfiber cloth and distilled water. Never use Windex or alcohol-based cleaners because these damage the screen coating.
Gentle pressure only, no scrubbing or rubbing hard.
Regular cleaning prevents dust buildup on the exterior and keeps your screen clear without creating new problems.
Store Your Laptop Safely
Keep your Lenovo in a cool, dry place when not using it. Extreme heat, cold, and humidity cause moisture to enter the screen, creating internal white spots.
Always store your laptop in a protective case and never leave it open on soft surfaces like beds or couches.
Soft surfaces block air vents, causing overheating that damages internal components.
Protective Measures (Screen Protectors, Cases)
Tempered glass screen protectors add an extra layer of defense against accidental impact. A quality laptop case absorbs drops and prevents pressure damage during transport.
A keyboard cover prevents accidental liquid spills and dust accumulation.
Budget $20 to $50 for all three protective items combined.
Will a white spot spread or get worse over time?
No, white spots typically don’t spread. Dust spots stay in one place. Stuck pixels don’t propagate to other pixels. Dead pixels can theoretically spread, but this is extremely rare. You can safely use your Lenovo laptop indefinitely with a white spot present without worrying about it getting worse.
Is it safe to keep using my laptop with a white spot?
Yes, completely safe. White spots are purely cosmetic and don’t affect your laptop’s performance, temperature, processing speed, or functionality. Your Lenovo will run exactly the same whether the white spot is there or not. You can continue using your laptop normally without any risk.
Can software really fix white spots?
Software fixes only work if your white spot is a stuck pixel. JScreenFix and similar tools have about a 40 percent success rate for stuck pixels. If your white spot is caused by dust between screen layers or pressure damage, software cannot fix it. You’ll need internal cleaning or professional repair for those cases.
How long will repairs take?
DIY internal cleaning takes one to two hours if you work carefully. Professional service typically takes two to four weeks from drop-off to pickup. Software fixes like JScreenFix take 20 minutes to over an hour depending on the stubborn nature of the stuck pixel. Professional screen replacement usually takes one to three days.
What’s the difference between a white spot and a dead pixel?
A dead pixel appears as a single black dot caused by a broken transistor and cannot be fixed. A white spot is a bright white patch usually caused by dust, pressure damage, or a stuck pixel and is often fixable. Take a screenshot to tell the difference. If the spot appears in the screenshot, it’s a pixel issue. If not, it’s a display issue.
Final Thoughts: Your White Spot Is Probably Fixable
White spots on Lenovo laptop screens are common, usually fixable, and definitely not a reason to panic or replace your entire laptop. You now have complete knowledge to make an informed decision about your next steps.
Here are your three action paths based on your comfort level:
If you prefer the cautious approach: Start with JScreenFix for free. This takes 20 minutes and works for stuck pixels. Update your graphics drivers next. If either method works, you’re done with zero cost.
If you’re moderately comfortable with electronics: Follow the detailed internal cleaning guide in Section 7. This approach works best if your white spot is dust related. The process takes two to three hours but saves you $150 or more in professional repair costs.
If you’re unsure or uncomfortable: Contact Lenovo support first and check your warranty status. If your laptop is still covered, you pay nothing for the repair. If not covered, get a professional repair quote before deciding. Peace of mind is worth the professional cost.
The white spot on your Lenovo laptop screen doesn’t define your laptop’s lifespan. Most white spots are fixable with the right approach and all of them are preventable with proper care moving forward.
Check your warranty first, contact Lenovo support if you’re unsure about coverage, and don’t let a small cosmetic issue ruin an otherwise perfectly good laptop.

