
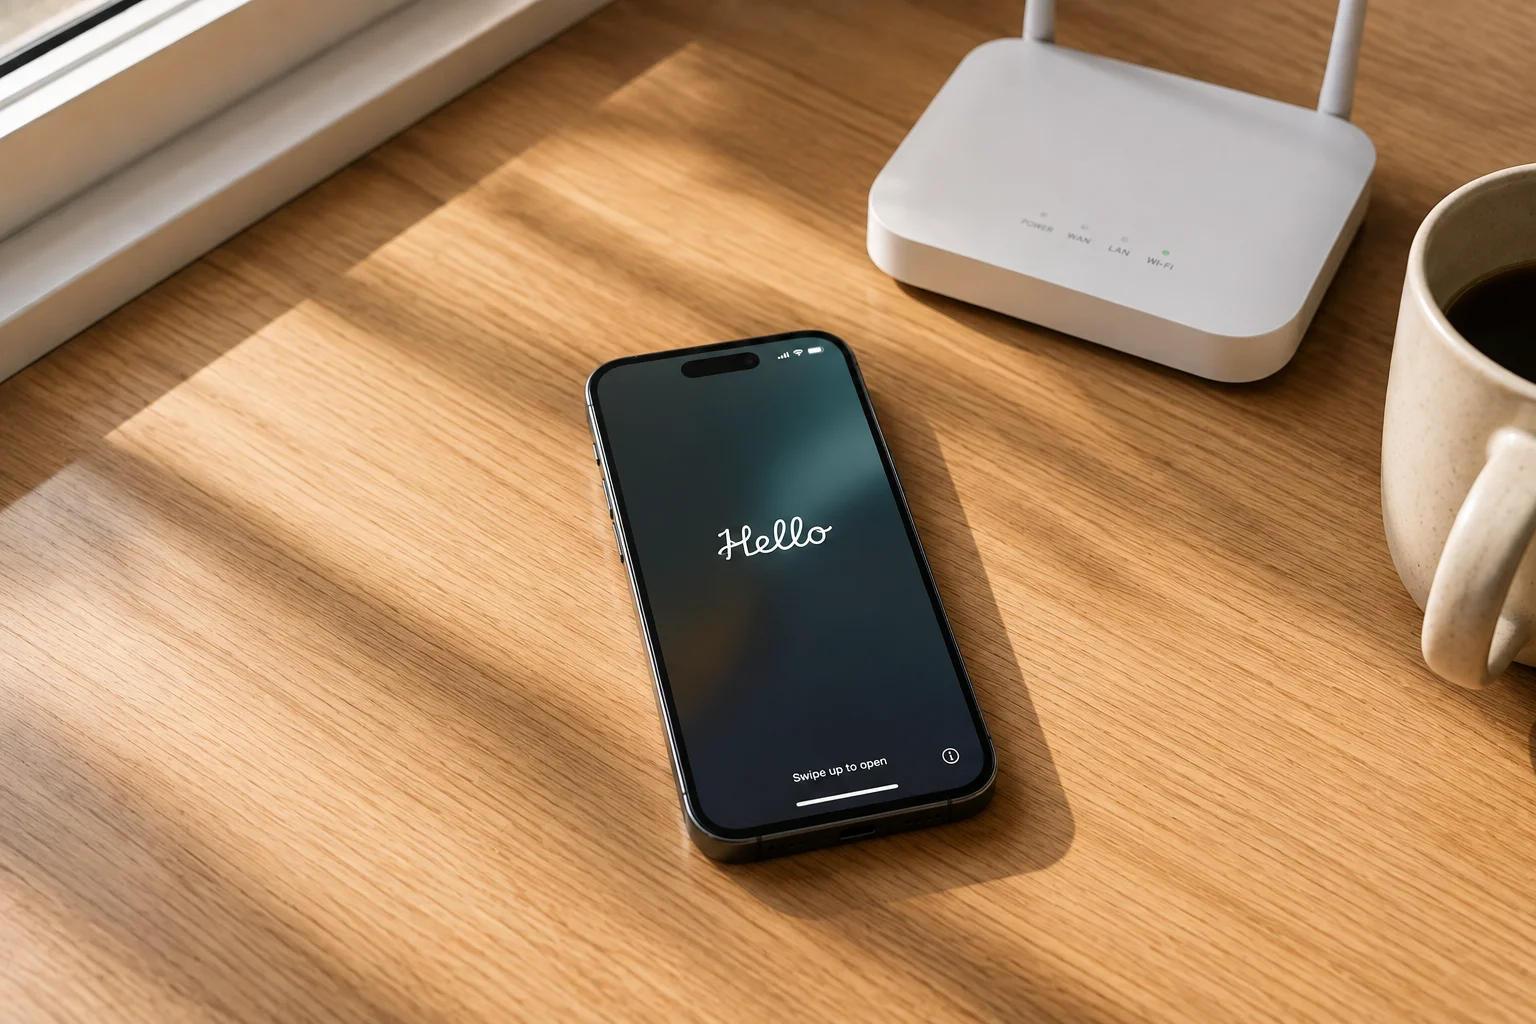
You activate an iPhone by turning it on, connecting to the internet, and walking through the Setup Assistant until you reach the Home Screen.
Here is what actually happens. Your iPhone needs to contact Apple’s servers to verify the device before it will let you use it. That is why you need a Wi-Fi network or cellular data for activation. Without an internet connection, the phone cannot complete the process. Apple Support lays this out clearly, and every activation follows the same basic path.
The full process changes slightly depending on where you are starting from. A brand new iPhone out of the box follows one path. A used phone that someone gave you follows another. And if your iPhone is stuck on a screen and will not move, that is a different problem with its own fix.
I have seen people waste time restarting their phone over and over when the real issue was something much simpler. Most activation problems are not hardware failures. They are usually a network issue, a server delay, or a setting that needs a quick change.
Some newer iPhones do not even have a physical SIM card slot anymore. The iPhone 14 and later in the U.S., the iPhone Air, and the iPhone 17 series in several markets are eSIM-only. That means there is no SIM tray to pop open. These phones activate entirely digitally, and I cover that in the eSIM section below.
You can even reach your Home Screen in approximately 2 minutes if you skip the non-essential steps and set up Face ID, passcode, and Apple ID later.I show you that fast path in the step-by-step walkthrough.
If you just want the full step-by-step for a new phone, go to the walkthrough. If your phone is stuck, jump to the troubleshooting section. And if you bought a used iPhone and it will not activate, the used phone section is the one you need
What You Need Before You Start
| What You Need | Why You Need It | Required? |
|---|---|---|
| Internet connection | iPhone needs to contact Apple’s activation servers | Yes |
| Apple ID | Used for Apple services, iCloud and App Store | Recommended |
| SIM or eSIM | Required for cellular service | Depends on model |
| Charger | Prevents the phone from shutting down during setup | Recommended |
| Old iPhone | Needed for Quick Start transfer | Only when transferring from another iPhone |
| Activation Lock removed | Required when activating a used iPhone | Yes for used iPhones |
have watched people get halfway through setting up a new iPhone and then stop dead because they did not have one thing ready.
Here are the basics to sort out before you press the power button.
You need a Wi-Fi network. Or a computer with an internet connection. Your iPhone has to reach Apple’s servers to finish activation, and it cannot do that without a connection.
If you do not have home Wi-Fi, you can turn on a mobile hotspot from another phone and connect the new iPhone to it. I have seen that work more than once for people who were setting up a phone in a place without Wi-Fi. It is not the usual path, but it works.
And if the Wi-Fi route fails for some reason, a computer with Finder on a Mac or iTunes on Windows can activate the phone directly through a cable. That is the backup plan. You will not need it most of the time, but it is good to know it exists before you reach the point where you need it.
You also need your Apple ID.
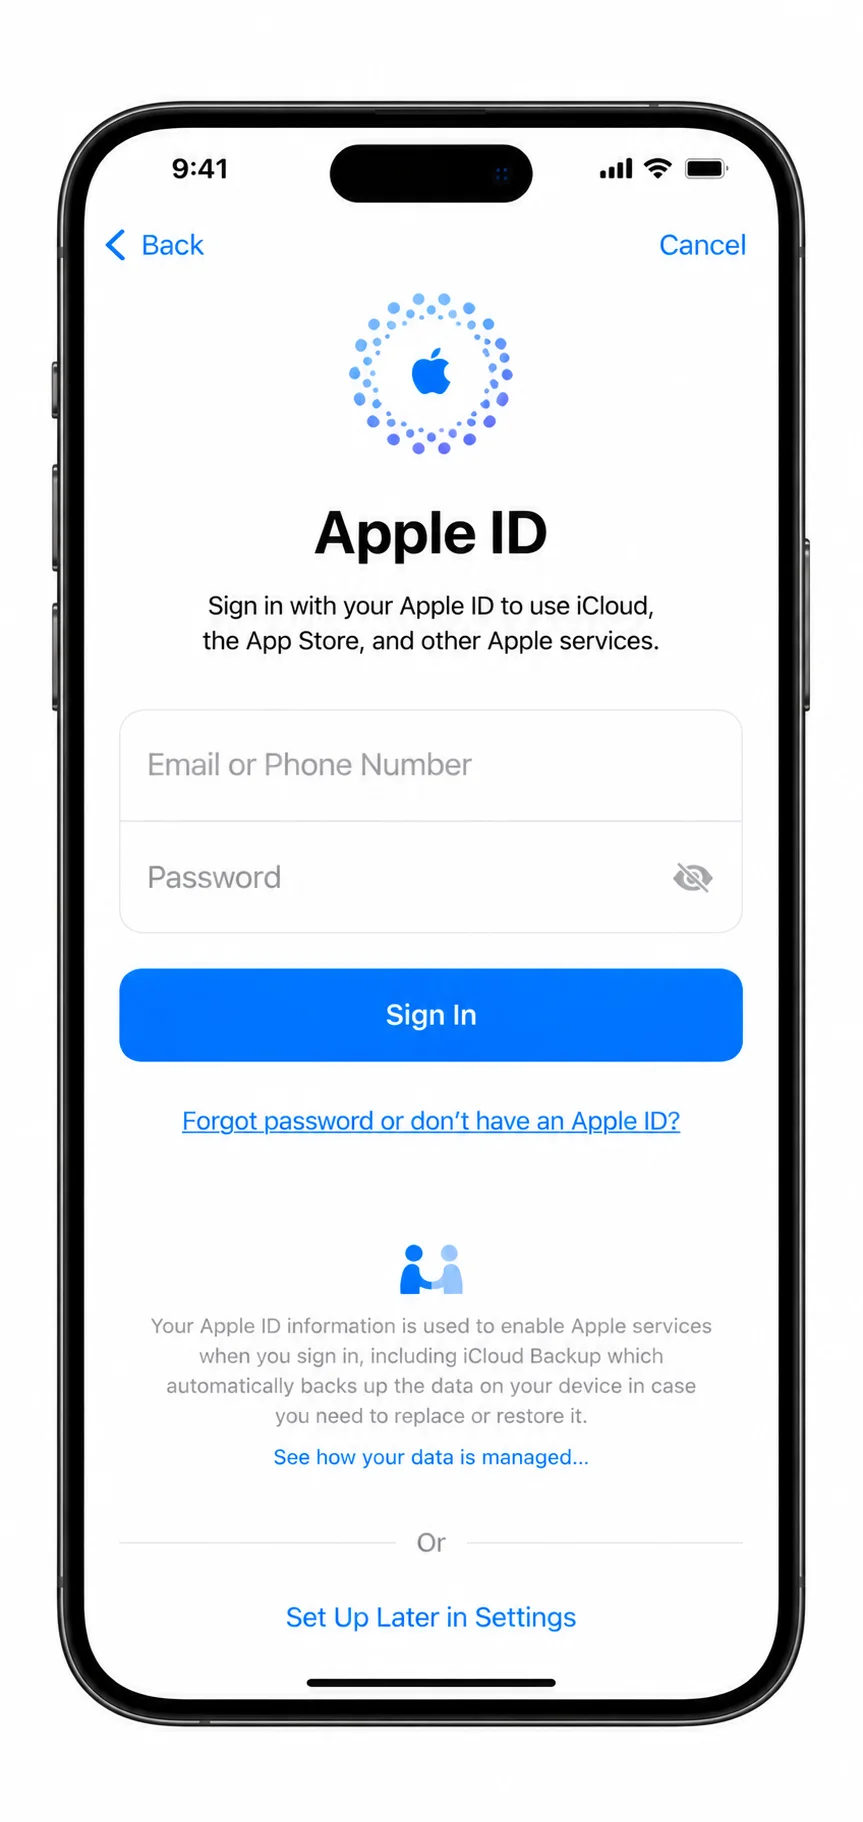
Here is the part most guides skip. You can create an Apple ID during setup if you do not have one. But if you already have one, have the email and password ready before you start. Nothing stalls a setup faster than reaching the sign in screen and realizing you forgot the password.
An Apple ID is required for a consumer iPhone to finish activation. There is a myth that you can skip it entirely. You cannot. You can create one on the spot, and you should, because it is tied to iCloud, the App Store, Messages, FaceTime, and all of that. Sign in with your Apple ID early and the rest of the setup flows much better.
If you are coming from another iPhone, keep your Apple ID password in mind. Two-factor authentication will send a code to your trusted devices or your phone number. Make sure you can get that code, or the sign in step turns into a rabbit hole.
For the cellular side, you need either a SIM card or an eSIM plan.
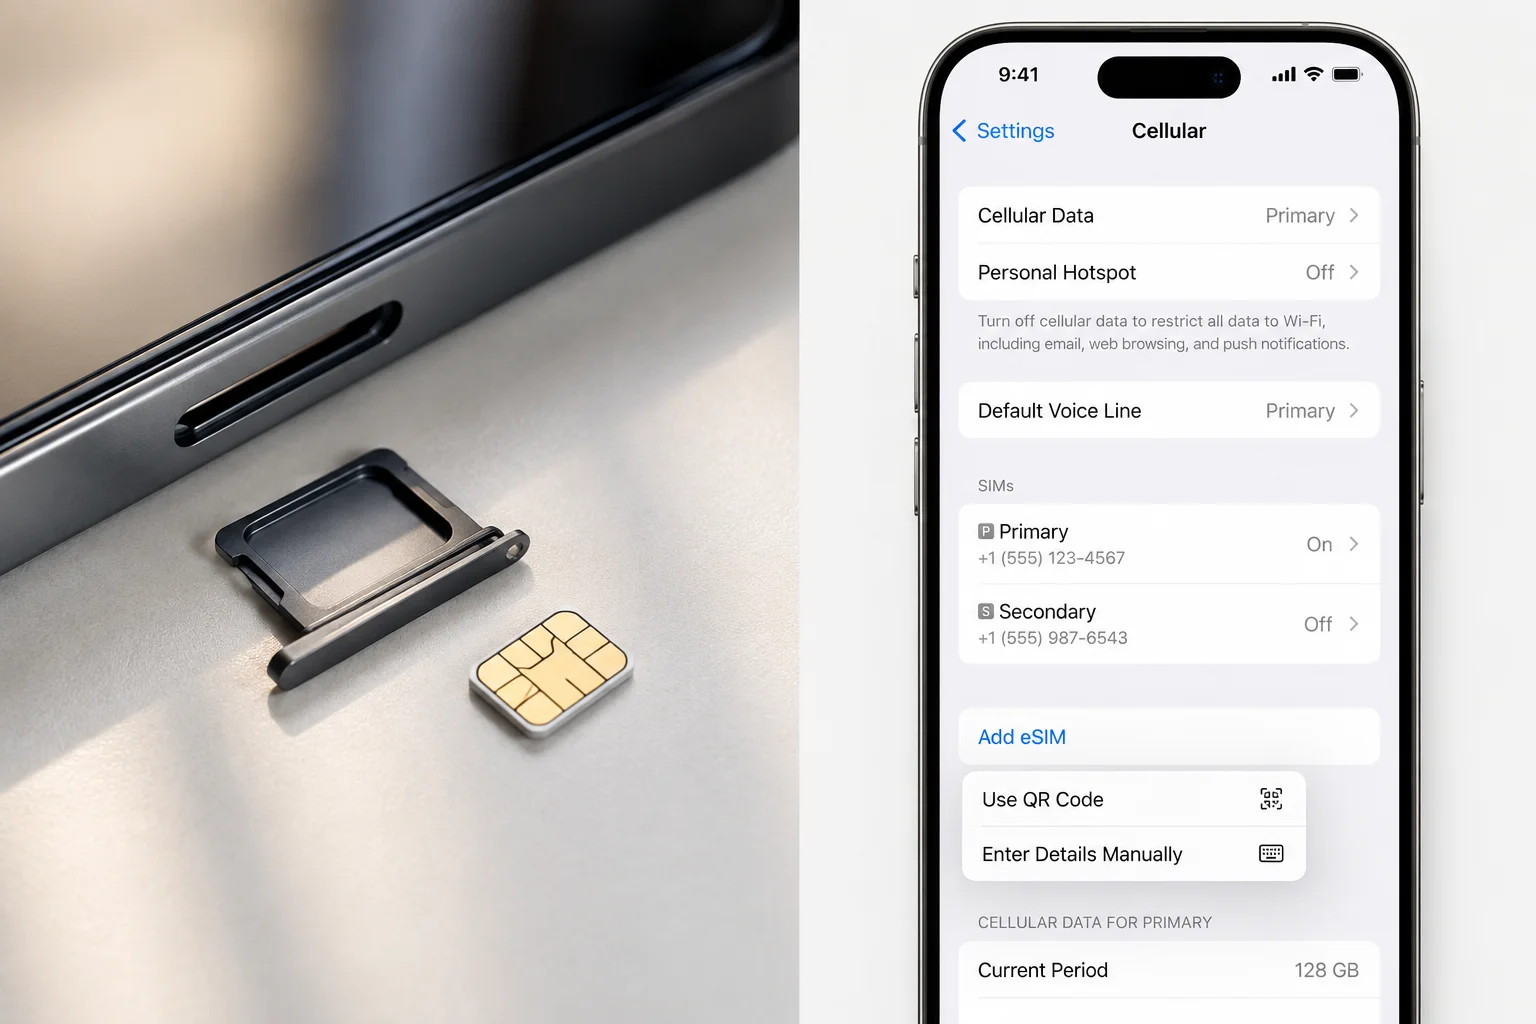
If your iPhone has a SIM tray, insert the nano SIM from your carrier. If you have an eSIM-only iPhone, you will need your eSIM details from the carrier instead. Some carriers push the eSIM automatically when you sign in. Others give you a QR code. A few let you type the details in manually. The eSIM-only models skip the physical card entirely, which is something many people do not realize until they are staring at a phone with no SIM slot.
Charge your iPhone before you start. Plug it in if you can.
I say this because setup takes longer than people expect, especially if you are restoring data from a backup. You do not want the battery dying halfway through.
If you are activating a used iPhone, the most important thing to check is not the battery or the SIM. It is Activation Lock.
Activation Lock is the security feature that ties an iPhone to the original owner’s Apple ID when Find My iPhone is turned on. If the previous owner did not remove it, you will hit a wall during setup and the phone will ask for their Apple ID and password. There is no way around that except through the original owner or Apple Support with proof of purchase. Activating an iPhone that still has Activation Lock attached to someone else is the one situation where a short preparation step saves you from a very expensive mistake.
So here is what I want you to have in front of you before you begin.
A stable internet connection. Your Apple ID and password. Your SIM card or eSIM details. A charger plugged in. And if the phone is used, confirmation that Activation Lock is gone.
That is all you need. The rest happens on the screen.
Most guides start with the power button and skip the preparation entirely. That is why people get stuck at the Apple ID screen with no password and no way forward. I want you to avoid that.
You also need your Apple ID.
Here is the part most guides skip. You can create an Apple ID during setup if you do not have one. But if you already have one, have the email and password ready before you start. Nothing stalls a setup faster than reaching the sign in screen and realizing you forgot the password.
An Apple ID is required for a consumer iPhone to finish activation. There is a myth that you can skip it entirely. You cannot. You can create one on the spot, and you should, because it is tied to iCloud, the App Store, Messages, FaceTime, and all of that. Sign in with your Apple ID early and the rest of the setup flows much better.
If you are coming from another iPhone, keep your Apple ID password in mind. Two-factor authentication will send a code to your trusted devices or your phone number. Make sure you can get that code, or the sign in step turns into a rabbit hole.
For the cellular side, you need either a SIM card or an eSIM plan.
If your iPhone has a SIM tray, insert the nano SIM from your carrier. If you have an eSIM-only iPhone, you will need your eSIM details from the carrier instead. Some carriers push the eSIM automatically when you sign in. Others give you a QR code. A few let you type the details in manually. The eSIM-only models skip the physical card entirely, which is something many people do not realize until they are staring at a phone with no SIM slot.
Charge your iPhone before you start. Plug it in if you can.
I say this because setup takes longer than people expect, especially if you are restoring data from a backup. You do not want the battery dying halfway through.
If you are activating a used iPhone, the most important thing to check is not the battery or the SIM. It is Activation Lock.
Activation Lock is the security feature that ties an iPhone to the original owner’s Apple ID when Find My iPhone is turned on. If the previous owner did not remove it, you will hit a wall during setup and the phone will ask for their Apple ID and password. There is no way around that except through the original owner or Apple Support with proof of purchase. Activating an iPhone that still has Activation Lock attached to someone else is the one situation where a short preparation step saves you from a very expensive mistake.
So here is what I want you to have in front of you before you begin.
A stable internet connection. Your Apple ID and password. Your SIM card or eSIM details. A charger plugged in. And if the phone is used, confirmation that Activation Lock is gone.
That is all you need. The rest happens on the screen.
Most guides start with the power button and skip the preparation entirely. That is why people get stuck at the Apple ID screen with no password and no way forward. I want you to avoid that.
Do You Have an Apple ID?
If you are not sure, you probably already have one. A lot of people use an Apple ID for years without thinking about it because it just works in the background.
It is the account that connects your iPhone to Apple services — you may also see it referred to as your Apple Account on newer devices, though most people still call it their Apple ID. You need it to activate the phone, restore from an iCloud backup, and use the App Store.
If you do not have one, create it during setup. Apple will walk you through it on the sign in screen. It takes a couple of minutes and you will not lose anything by doing it there.
If you forgot your password, use the account recovery option before you start the setup. That way you are not stuck at the sign in step with no way to move ahead.
Signing in with your Apple ID during activation is the cleanest path. You can sign in later from Settings, but doing it now keeps everything connected from the start.
How to Set Up Your iPhone for the First Time: The Step-by-Step Walkthrough
You hold the box and you want to start using the phone. The first thing I do is press the power button and let the Setup Assistant take over.
That is how you set up iPhone for the first time. The phone walks you through every screen in order, and the onscreen instructions tell you exactly what to do at each step. You cannot skip ahead to the parts you care about most.But you can choose to defer some settings and finish them later from the Settings app.
The process handles one thing at a time. Language. Network. Security. Account. Data. Final touches. When you reach the Home Screen, the iPhone is activated and ready.
Here is what each step looks like and what I do at every stage.
Step 1 — Power On and the “Hello” Screen
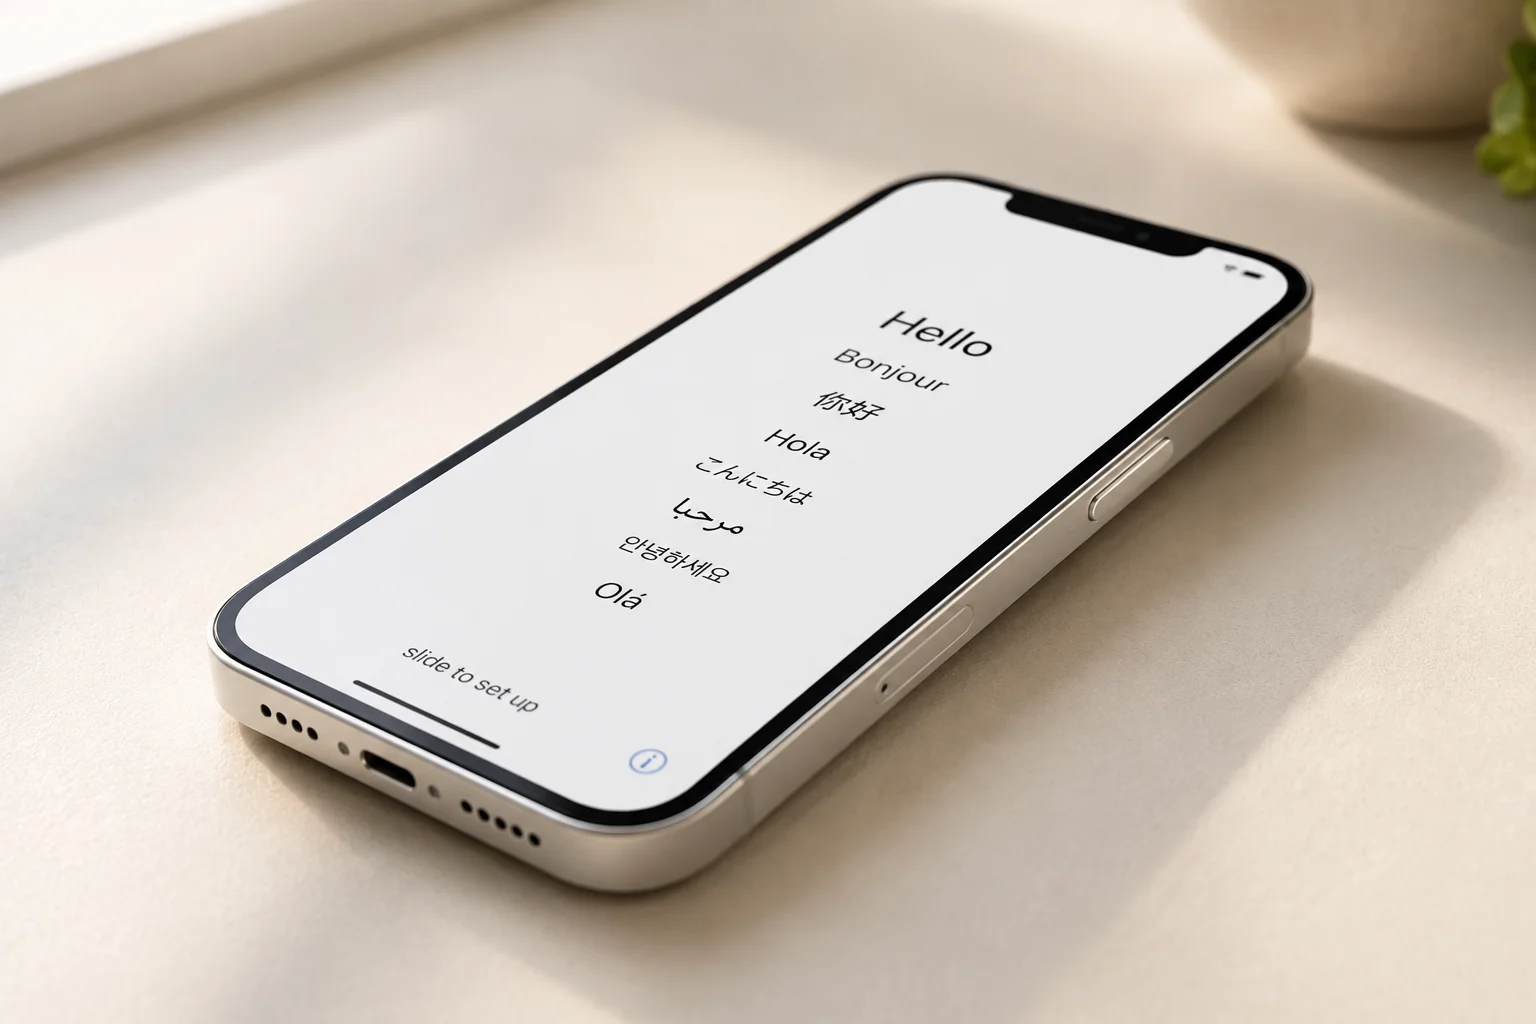
To turn on your iPhone, press and hold the Side button on the right edge. Keep holding it until the Apple logo appears. Then let go.”
The screen lights up. You swipe up from the bottom to begin.
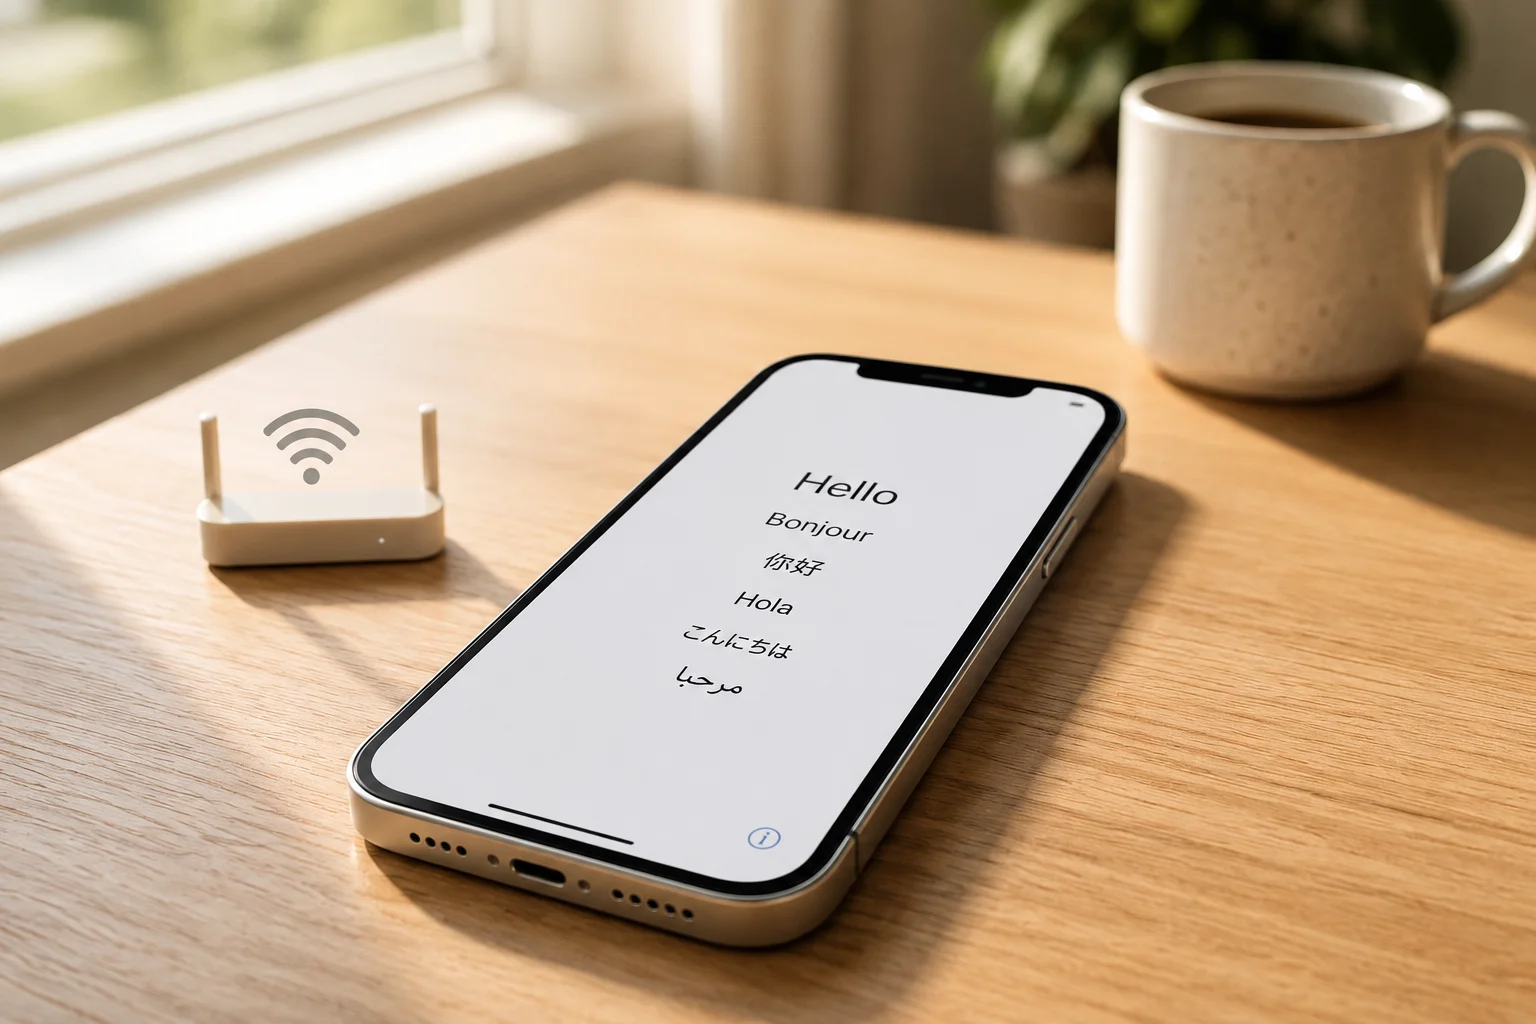
This is the “Hello” screen. Every new iPhone and every erased iPhone shows it. The Setup Assistant starts here and it does not let you skip this part.
You pick your language first. Then you choose your country or region.
These choices matter more than people expect. They set your keyboard layout. They set your date and time formats. They decide which local services show up during setup. Pick the options that match where you actually live.
And that is the first fork in the road. If you have your old iPhone nearby, you might see a Quick Start prompt. That is Apple asking if you want to transfer settings automatically. You can do that in Step 5. Or you can tap “Set up without another device” and continue manually.
I usually choose manual setup when I am going through this myself. It gives me more control over what gets transferred and when.
Step 2 — Connect to Wi-Fi (or Use a Fallback)
The iPhone asks you to choose a Wi-Fi network next.
Pick your network. Enter the password. Wait for the connection to stick. And if you do not know the password, you can share the Wi-Fi password from another iPhone instead of typing anything
This step is not optional for most people. Your iPhone has to contact Apple’s servers to verify the device. Without an internet connection, the activation cannot finish. Apple Support is clear about this requirement, and the Setup Assistant enforces it.
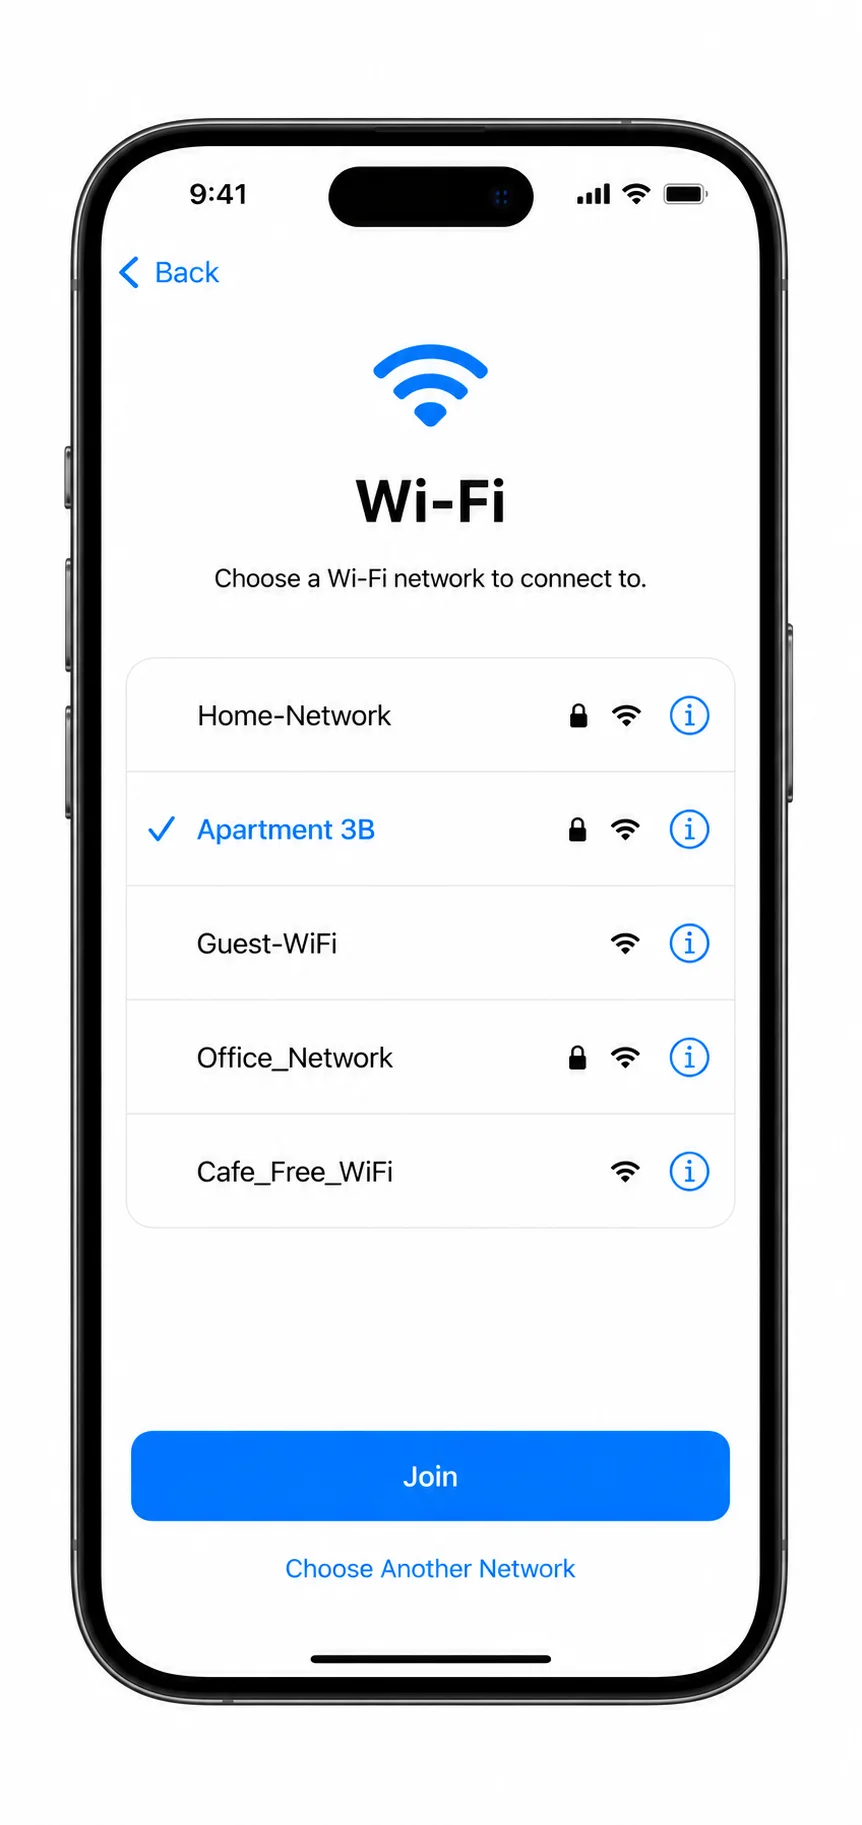
If you do not have home Wi-Fi available, you have options.
You can turn on a mobile hotspot from another smartphone and connect the new iPhone to it. I have done this when setting up a phone away from home. It works fine for activation. You just need any stable internet connection.
And if Wi-Fi simply will not cooperate, you can connect the iPhone to a computer with a USB cable. A Mac with Finder or a Windows PC with iTunes can activate the device directly. That is the fallback I cover in the troubleshooting section when the on-device flow gets stuck.
For now, just get the iPhone online. The rest of the setup depends on it.
Step 3 — Set Up Face ID / Touch ID and Passcode
Next comes the security step.
The iPhone asks you to set up Face ID or Touch ID. Face ID works on newer models by scanning your face. Touch ID works on older models and some SE models by scanning your fingerprint.
I always set this up during activation. It unlocks the phone. It approves App Store purchases. It enables Apple Pay. You can set it up later from Settings, but doing it now means the phone is secure from the start.
Then comes the passcode.
Apple defaults to a six-digit code. You can choose a four-digit code or a custom alphanumeric code from the Passcode Options menu.
Here is the thing about the passcode. You can skip it entirely if you want to move faster. I have seen people tap “Don’t use passcode” just to reach the Home Screen quickly. That option exists. But some features will not work without a passcode. Apple Pay is one of them. App Store purchases are another.
And this is exactly where things go wrong for people who rush. They skip the passcode, get to the Home Screen, and then realize they cannot use their wallet or download an app. Then they have to go back into Settings and set it up anyway.
Which is the whole point. You can defer it. Just know what you are deferring.
Step 4 — Sign In with Your Apple ID
This is the step that stalls most setups.
The iPhone asks you to sign in with your Apple ID. Enter your email and password.
If you have two-factor authentication turned on, Apple sends a code to your trusted devices or your phone number. Enter that code to approve the sign in.
If you do not have an Apple ID, you can create one right here. The Setup Assistant walks you through it. It takes a couple of minutes and you will not lose anything by doing it during setup.
If you forgot your password, do not guess at it. Use the account recovery option before you start the setup. I say this because nothing wastes more time than reaching this screen and realizing you are locked out.
Now here is the option most guides skip.
You can tap “Set up later in Settings” and move past this screen without signing in.
I have done this myself when I wanted the phone activated fast and did not want to deal with sign in at that exact moment. The iPhone lets you do it. You reach the Home Screen. Everything works on Wi-Fi.
But not everything works without an Apple ID. iCloud does not sync. The App Store does not let you download apps. Messages and FaceTime need it too. So skipping is fine if you just want the phone on. But sign in before long, or you will keep hitting walls.
An Apple ID is required for a consumer iPhone to finish activation. You can create it during setup, but you cannot skip it entirely if you want the full experience.
Step 5 — Transfer Data (or Set Up as New)
| Transfer Method | Best For | Requires Old iPhone? | Internet Needed? |
|---|---|---|---|
| Quick Start | iPhone → iPhone transfer | Yes | Yes |
| iCloud Backup | Restoring from cloud backup | No | Yes |
| Finder/iTunes | Local computer backup | No | Computer connection |
| Set Up as New | Clean installation | No | Yes |
| Move to iOS | Android → iPhone | Android phone | Yes |
This is the part people care about most. They do not want to lose their photos.
Apple gives you three ways to move your data.
Quick Start is the default I recommend. It transfers data directly from your previous iPhone to the new one. Both phones need to be nearby. Both phones should be plugged in or charged. You keep them close and you wait. Apple Support marks this as the recommended method for a reason. It is the cleanest path for most people upgrading from another iPhone.
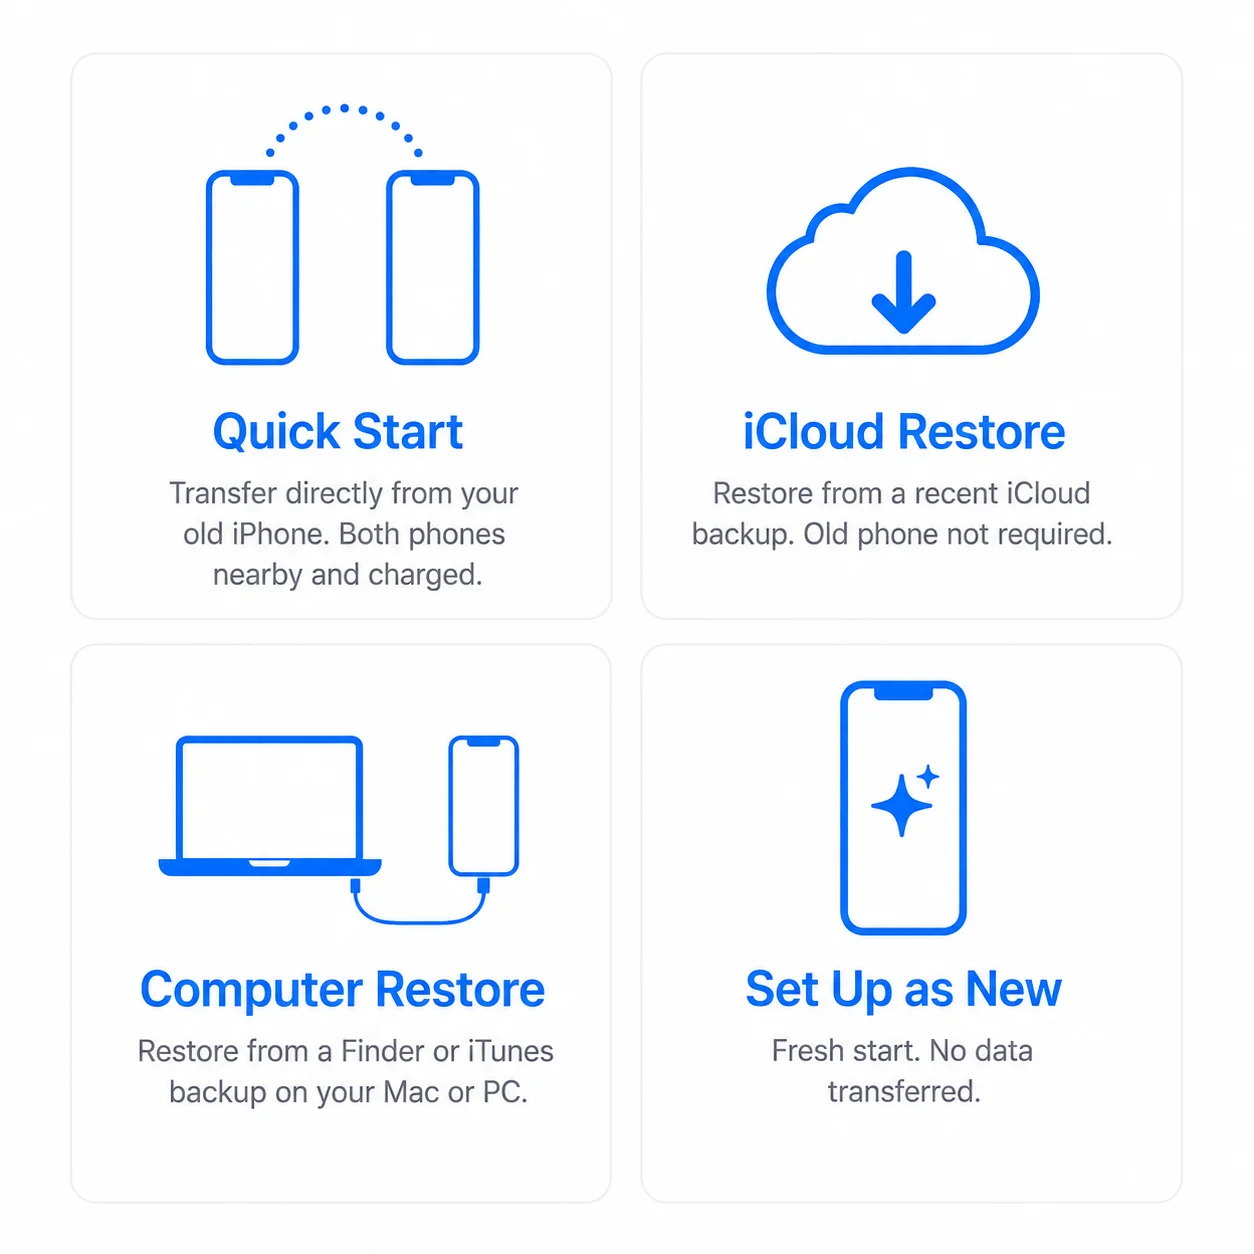
If you have a recent iCloud backup, you can restore from that instead. This works well if your old phone is not available or if you prefer a cloud restore. The catch is that the backup has to be recent. An old backup restores old data, and that defeats the purpose.
If you back up to a computer with Finder or iTunes, you can restore from that too. This is the method I use when I want a full local backup before making any changes. It gives me more control than the cloud options.
And if you just want a clean start, choose “Set Up as New iPhone.” No data moves. Fresh start. You build it from scratch.
For people switching from Android, Quick Start does not work. You will need the Move to iOS app on your Android phone to transfer contacts, messages, photos, and some apps. I cover that in the Android switcher section. The activation steps are the same, but the data transfer path changes.
One thing I want to mention here. If you are activating a used iPhone that someone gave you, and it still has someone else’s data on it, you erase it first. That sends you back to this Hello screen. The used phone section explains when and how to do that safely.
Step 6 — Finish Setup: Siri, Location, Updates, and Home Screen
The remaining screens come fast.
Siri asks whether you want to enable the voice assistant. Location Services asks if apps can use your location for maps, weather, and similar things. Analytics asks if you want to share usage data with Apple. Automatic Updates asks if you want iOS to install security patches on its own.
I usually enable Siri. I keep Location Services on for maps and weather. I accept Automatic Updates because I do not want to remember to patch my phone manually.
Then you reach the Home Screen.
At this point the iPhone is activated. You have power on. You connected to the network. You set up security. You signed in or deferred it. You chose how to handle your data. The phone is yours.
But do not stop here.
There is a short checklist I run through after every setup. Updates. Find My. iCloud Backup. A test call. Apple Pay if I use it. I cover all of that in the post-activation checklist section
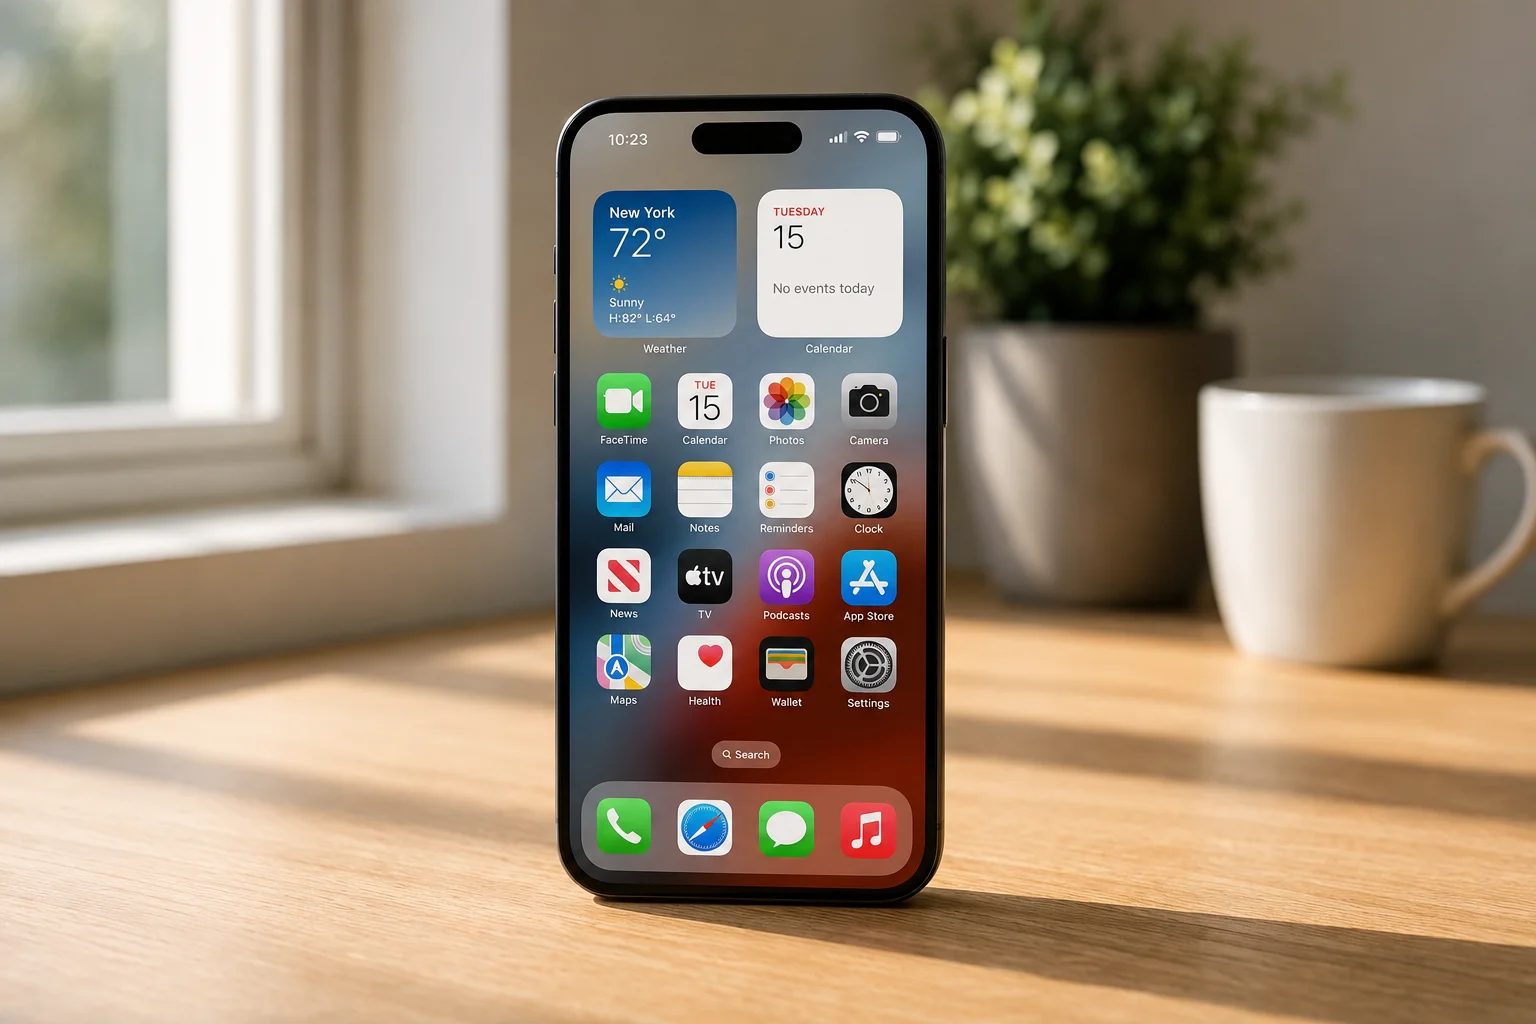
Because reaching the Home Screen is not the same as having a fully ready phone. And that distinction matters more than most guides admit.
How Can I Activate My eSIM on My iPhone?
| eSIM Activation Method | How It Works | What You Need |
|---|---|---|
| Carrier Activation | Carrier automatically pushes the eSIM to the iPhone | Supported carrier |
| QR Code | Scan the QR code supplied by your carrier | Carrier QR code |
| Manual Entry | Enter SM-DP+ address and activation code | Carrier activation details |
| eSIM Quick Transfer | Transfer the number from a nearby iPhone | Compatible iPhones and iOS 18.4+ |
| Carrier App | Activate through your carrier’s iPhone app | Carrier app and supported account |
The SIM card is not what it used to be.
I have set up iPhones that needed a tiny plastic card popped into a tray. And I have set up iPhones that just needed a digital profile downloaded over the air. The second option is an eSIM.
An eSIM is a digital SIM built into the iPhone. You do not insert anything physical. You download the carrier profile and the phone connects.
This is the part that confuses people. They hear about eSIM and assume it is some extra step on top of the physical SIM. It is not. For some iPhones, it is the only option.
The iPhone 14 and later models in the U.S. are eSIM-only. The iPhone Air went eSIM-only globally. The iPhone 17 series is eSIM-only in several markets. Those phones have no SIM tray at all. You cannot insert a card because there is no slot.
That turns the old advice on its head. You do not need a physical SIM card to activate every iPhone. You need either a physical SIM or an eSIM, depending on your model.
The shift is already here. Consumer eSIM profile downloads surged by 56% in 2024, and half the world’s countries now support eSIM. Thales’ eSIM platform has handled more than 400 million activations. The forecast from GSMA Intelligence expects eSIM smartphone penetration to double in 2026 and double again in 2027. The numbers are not small.
So if you are wondering how can I activate my eSIM on my iPhone, the answer depends on what your carrier offers. There are five methods. One of them will fit your situation.
What Is eSIM and Why Does It Matter?
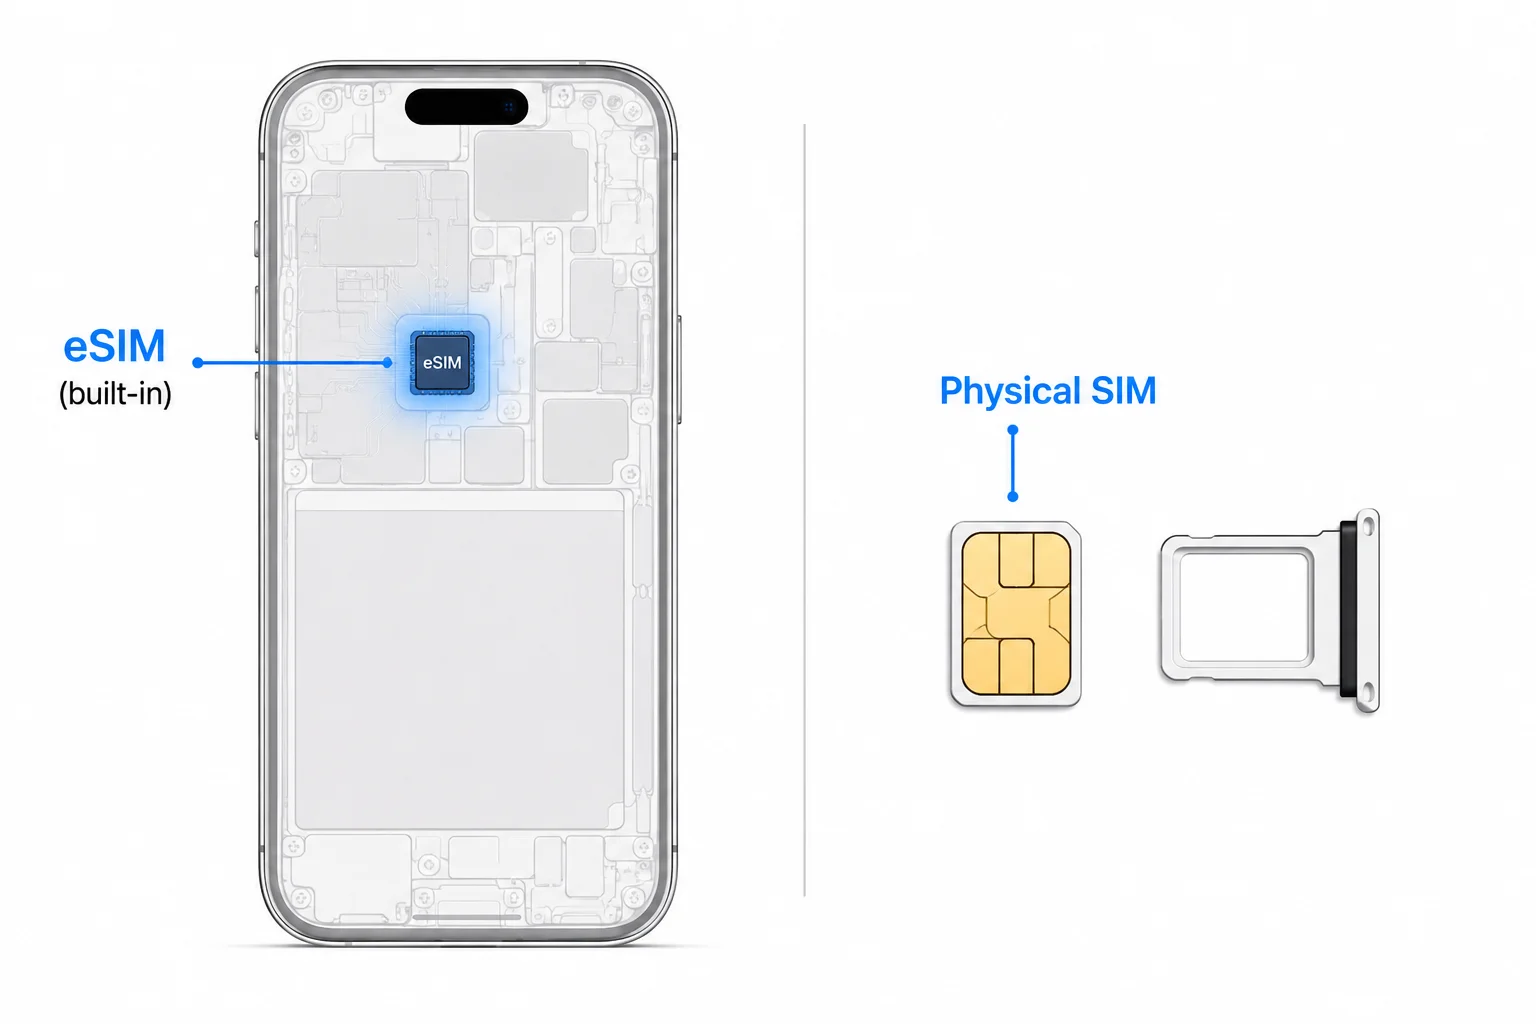
Think of an eSIM as the SIM card, but built into the phone’s hardware instead of sitting in a tray.
That is the simplest way to put it.
You can manage multiple eSIM profiles on compatible iPhones. Apple says you can store up to eight or more. You activate one and keep the others ready. When you activate a new eSIM, the old one deactivates automatically. You do not need to call your carrier to cancel anything. There is no double billing worry from the phone side.
And that changes everything for people who switch phones often or travel.
Activate iPhone Without a SIM Card (eSIM-Only Models)
Can you activate an iPhone without a SIM card?
Yes, if your iPhone is an eSIM-only model. The iPhone 14 and later in the U.S., the iPhone Air globally, and the iPhone 17 series in select markets have no physical SIM tray. They activate entirely digitally.
If you have an older iPhone with a SIM tray, you still need a SIM for cellular service. That can be a physical card or an eSIM. But the phone itself must have a way to connect to a cellular network.
Some eSIM-only models can activate using cellular data directly in certain regions, without Wi-Fi. Apple’s support pages cover this. It is worth checking what your specific iPhone model and region allow.
Method 1 — eSIM Carrier Activation (Automatic)
This is the easiest method when your carrier supports it.
Your carrier pushes the eSIM profile to your iPhone automatically. You will see a “Finish Setting Up Cellular” notification pop up. Tap it. Follow the prompts. The plan downloads and you are done.
Use this method if your carrier offers it and you are setting up a new line or moving an existing one during setup.
Method 2 — Scan a QR Code from Your Carrier
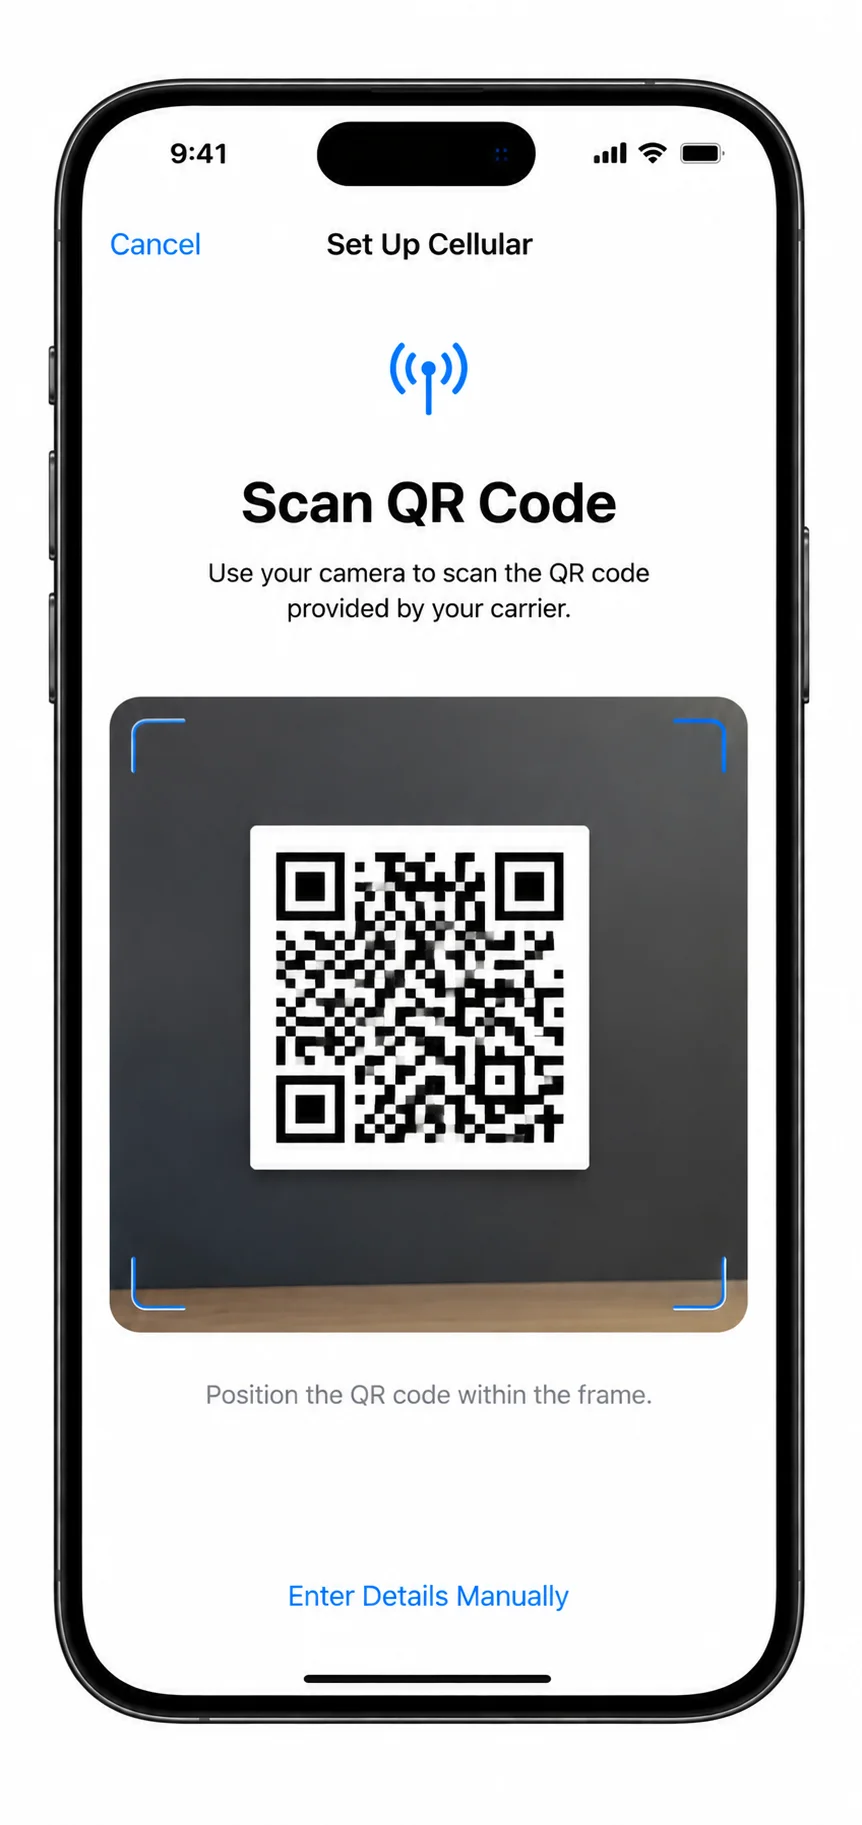
Your carrier gives you a QR code. You scan it with the iPhone camera.
Go to Settings. Tap Cellular. Tap Add eSIM. Then tap Use QR Code. Point the camera at the code your carrier provided. Stay on Wi-Fi until the download finishes.
Use this method if your carrier sent you a printed or digital QR code and you are not setting up during the initial flow.
If the QR code will not scan, do not force it. Move to the manual entry method.
Method 3 — Enter Details Manually
Sometimes the QR code fails. Or you do not have one.
In that case, choose Enter Details Manually from the Add eSIM screen. You will need the SM-DP+ address and the Activation Code from your carrier. Type them exactly as provided. Add a Confirmation Code if your carrier asks for one.
Use this method when the QR approach does not work or when your carrier gives you manual details instead.
Method 4 — Transfer eSIM from Your Old iPhone (Quick Transfer)
You have an old iPhone and you want the same number on the new one without calling your carrier.
On the new iPhone, go to Settings. Tap Cellular. Tap Add eSIM. Then tap Transfer From Nearby iPhone.
Keep both phones unlocked. Keep Wi-Fi and Bluetooth on. Make sure both are signed into the same Apple ID. Approve the transfer on the old phone and wait for the signal to appear on the new one.
One thing to know. After the transfer, your phone number stops working on the old iPhone. The number moves to the new device. That is the design.
You need iOS 18.4 or later on both devices for eSIM Quick Transfer to work. Apple’s official support documentation lists this requirement. If either phone is on an older version, this method will not be available.
Use this method when you are upgrading from another iPhone and want to keep your number without involving the carrier.
Method 5 — Activate Through Your Carrier’s App
Your carrier has an app in the App Store. Download it. Open it. Follow the in-app instructions to activate cellular service.
Use this method if you prefer your carrier’s own interface or if the other methods are not available for your account.
Set Up Your Cellular Plan
Whichever method you use, the goal is the same. You need to set up your cellular plan so the iPhone can make calls, send texts, and use mobile data.
Go to Settings. Tap Cellular. Make sure the new line is turned on. Check that the correct line is set as your default for calls, messages, and cellular data.
And if you ever wonder whether the old SIM is still active. It is not. The new eSIM takes over. Apple’s design handles that switch automatically. No extra step from you.
iPhone Stuck on Activation Screen? Here’s What to Do
| iPhone Activation Problem | Likely Cause | What to Try |
|---|---|---|
| Unable to Activate | Apple server or network issue | Check System Status and switch networks |
| Activation Server Unavailable | Apple activation server problem | Check Apple’s System Status page |
| SIM Not Supported | Carrier lock or incompatible SIM | Contact the carrier or use the supported carrier SIM |
| Invalid SIM | SIM/carrier issue | Check SIM or contact carrier |
| eSIM won’t download | eSIM or carrier issue | Restart, toggle Airplane Mode or request a new QR code |
| Stuck on “It may take a few minutes to activate” | Network or activation problem | Restart and try another network |
| Apple ID/password appears during setup | Activation Lock may be enabled | Contact the previous owner or Apple with proof of purchase |
You turn on the iPhone and it just sits there. Spinning. Stuck. Maybe it says “Unable to Activate” or “Activation Server Unavailable.” Or maybe it will not move past the Hello screen at all.
And the first thought that hits you is the worst one. Is the phone broken?
Almost always, the answer is no.
I have seen this panic enough times to know what usually happens next. People restart the phone. They try a different Wi-Fi network. They reset settings. They call support. And none of that helps because they are solving the wrong problem.
The iPhone stuck on activation screen problem is usually not a hardware failure. It is far more often a server issue, a network glitch, or a carrier mismatch. Apple’s activation servers occasionally have problems. There was a widely reported outage in late 2025 that affected users of the newest iPhone models, where activation failed at scale because of server issues rather than device problems. That kind of event is rare, but it proved something important. Activation is not a device-only process. It depends on Apple’s servers, and those servers can have a bad day.
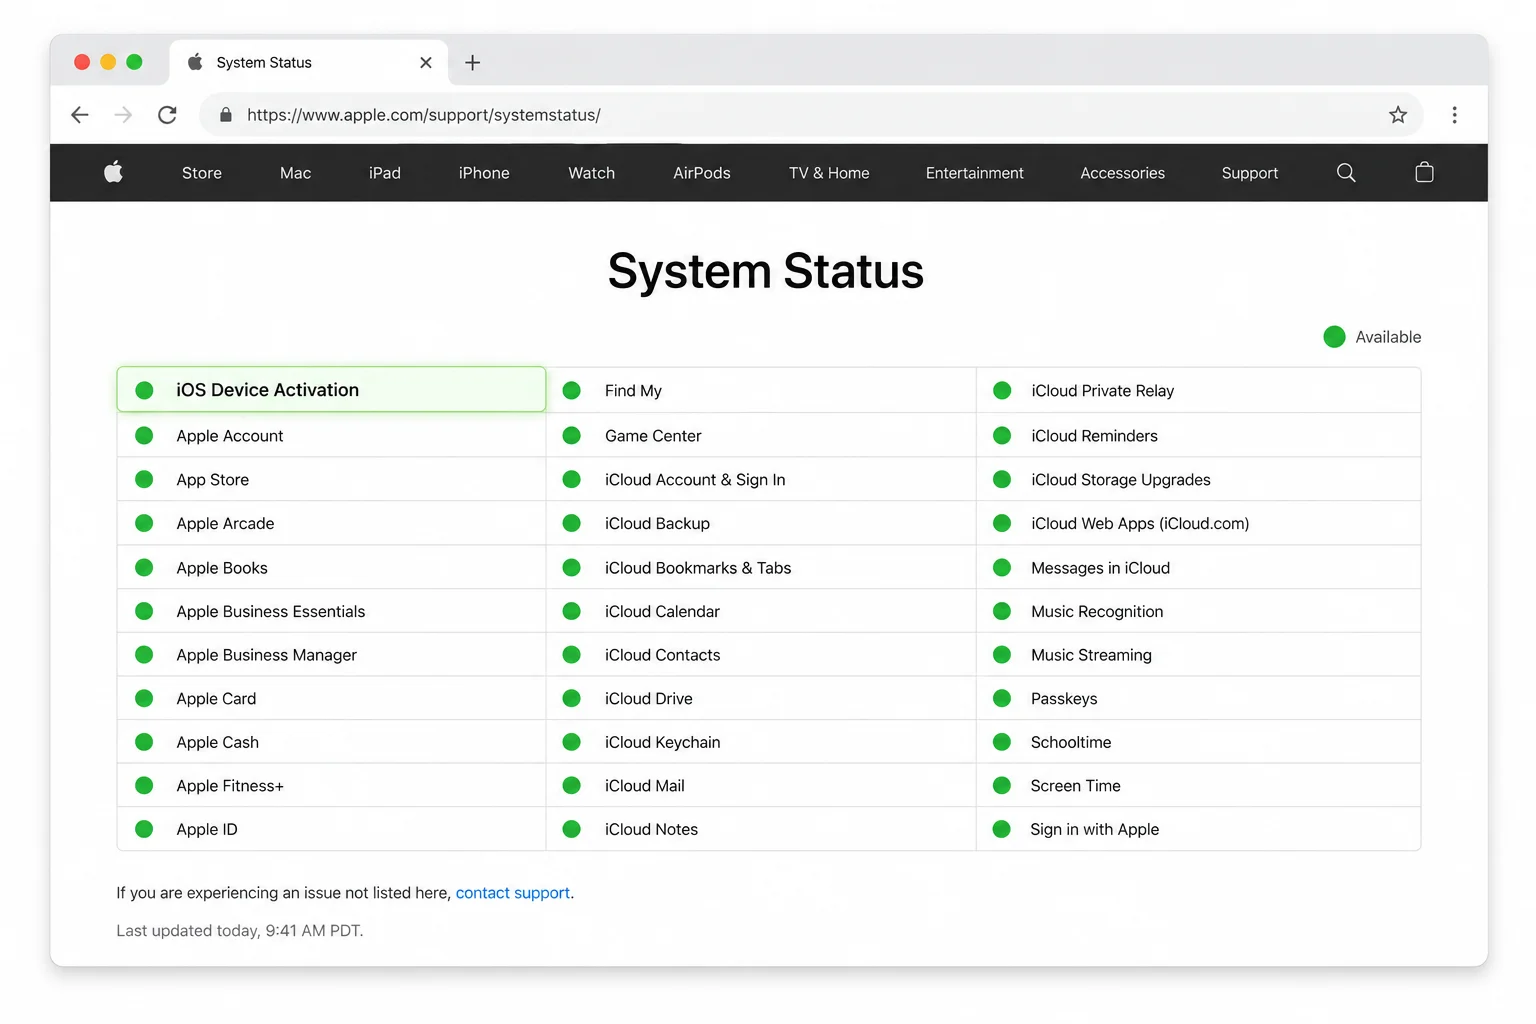
So before you assume the worst, here is the order I follow.
Step 1 — Check Apple’s System Status Page (Before Anything Else)
This is the step most people skip because they do not know it exists.
Go to Apple’s System Status page and look for “iOS Device Activation.” If the box next to it is green, Apple’s servers are fine and the problem is on your end. If it is not green, the servers are having issues and you should wait and try again later.
That single check can save you an hour of restarting your phone and changing network settings for a problem that is completely out of your hands.
I check this page first every time someone tells me their iPhone will not activate. It is the fastest way to rule out the most common cause.
Step 2 — Force Restart Your iPhone
A force restart clears temporary glitches that can block activation.
If you have an iPhone 8 or later, press and release Volume Up. Then press and release Volume Down. Then hold the Side button until the Apple logo appears. Let go and wait for the phone to restart.
If you have an iPhone 7, hold the Side button and Volume Down at the same time until the Apple logo appears.
Then try activation again from the beginning. A lot of the time, that is all it takes.
Step 3 — Switch Your Network Connection
Activation depends heavily on network connectivity. If the phone cannot reach Apple’s servers cleanly, it stalls.
Try a different Wi-Fi network. Turn Wi-Fi off and back on. Toggle Airplane Mode for a few seconds and then turn it off. And if the iPhone shows it is connected but activation still will not move, the network itself may be the problem — here is my full guide to fixing Wi-Fi that is connected but has no internet. If you are on cellular data, switch to Wi-Fi instead. If Wi-Fi is not available, use a mobile hotspot from another phone or connect the iPhone to a computer with a USB cable.
I have seen people solve a stuck activation just by switching from one Wi-Fi network to another. The original network had something blocking the connection, and a different network cleared it immediately.
Step 4 — Activate Using a Computer (Finder or iTunes)
When over-the-air activation will not work, a computer can do it directly.
Connect the iPhone to a Mac with a USB cable and open Finder. Or connect it to a Windows PC with iTunes installed and open iTunes. If the iPhone prompts you to trust the computer, tap Trust and enter your passcode.
In Finder or iTunes, choose Update when prompted. Not Restore. Update keeps your data. Restore erases it. The computer contacts Apple’s servers directly and can activate the device when the phone could not do it alone over Wi-Fi.
If the phone is completely stuck, you can try Recovery Mode. Connect the cable first. Then press and release Volume Up. Press and release Volume Down. Then hold the Side button until the recovery screen appears. In Finder or iTunes, choose Update and wait for the process to finish.
I mention this method because it works when nothing else does. Apple Support lists computer activation as the official fallback, and I have seen it resolve cases where the phone simply would not move forward on its own.
What Specific Error Messages Mean
Different error messages point to different problems.
“Unable to Activate” or “Activation Server Unavailable” usually means a server issue or a weak network connection. Check the System Status page, switch networks, or use the computer method.
“SIM Not Supported” or “Invalid SIM” usually means the iPhone is carrier-locked. The phone will only work with the original carrier’s SIM until it is unlocked. Use a SIM from that carrier to finish setup, or contact that carrier to request an official unlock.
If your eSIM will not download, toggle Airplane Mode on and off, then restart the iPhone. Remove the eSIM plan and add it again. If the QR code shows as used or expired, ask your carrier to reissue it.
If the phone hangs on “It may take a few minutes to activate” for a long time, restart and try a different network. If that does not work, move to the computer method.
One more thing. If you see a password prompt during activation, that may mean Activation Lock is enabled. That is a different problem, and it is covered in Section 6.
When to Call Apple vs. Your Carrier
Call Apple when Activation Lock is blocking you, you cannot sign in to your Apple ID, or the “Unable to Activate” message continues after you have checked the server status, restarted, switched networks, and tried the computer method.
Call your carrier when the problem is clearly about your line or SIM. eSIM downloads that will not start. “SIM Not Supported” or “Invalid SIM.” Number transfer delays. Or if you need an official carrier unlock.
Before you call either one, have a few things ready. Your iPhone’s IMEI. Your SIM’s ICCID if you are using a physical card. Your account PIN or passcode. And if the phone is used, your proof of purchase with the serial number or IMEI.
That preparation matters. Support can help faster when they have the right information from the start.
Most of the time, the phone is fine. The problem is fixable. And you do not need to assume the worst before you try the simple things in order.
How to Activate a Used iPhone (and Handle Activation Lock)
Buying a used iPhone feels like a good deal until the setup screen asks for someone else’s password.
That is the moment most people realize they have a problem they did not expect.
Here is the thing about used iPhone activation. The process is usually simple if the phone is clean. And if it is not clean, you need to know exactly what kind of lock you are dealing with, because the fix depends on it.
I have watched people erase a used phone and then hit a wall. The phone goes back to the Hello screen, they tap through, and suddenly it demands an Apple ID and password they do not have. That is not a glitch. That is a feature working exactly as designed.
Activating a Used iPhone That’s Already Clean
| Used iPhone Situation | What It Means | Correct Solution |
|---|---|---|
| Phone reaches Hello screen normally | Activation Lock is likely removed | Set up normally |
| Previous owner’s Apple ID appears | Activation Lock is still enabled | Previous owner must remove the device |
| You have valid proof of purchase | Apple may be able to help | Contact Apple Support |
| Company ownership screen appears | Device may be enrolled in MDM/Apple Business Manager | Organization must release it |
| Third-party “Activation Lock bypass” offer | Not an official removal method | Avoid it |
If the seller has already removed Activation Lock and the phone is carrier-unlocked, activation is straightforward.
Start by erasing the device. Go to Settings. Tap General. Tap Transfer or Reset iPhone. Then tap Erase All Content and Settings.
This wipes the phone and sends you back to the Hello screen. From there, you follow the same walkthrough I covered in Section 3.
Connect to Wi-Fi. Set up Face ID or your passcode. Sign in with your Apple ID. Add your SIM or eSIM. Choose whether to restore from a backup or set up as new.
That is it.
The only difference between this and a brand-new phone is the erase step at the start.
One warning before you erase. Make sure Activation Lock is actually removed first. If you erase a phone that is still tied to the previous owner’s Apple ID, you will just hit the same wall again after the reset. And then you are in the harder situation I describe below.
When Activation Lock Pops Up: What It Is and What to Do
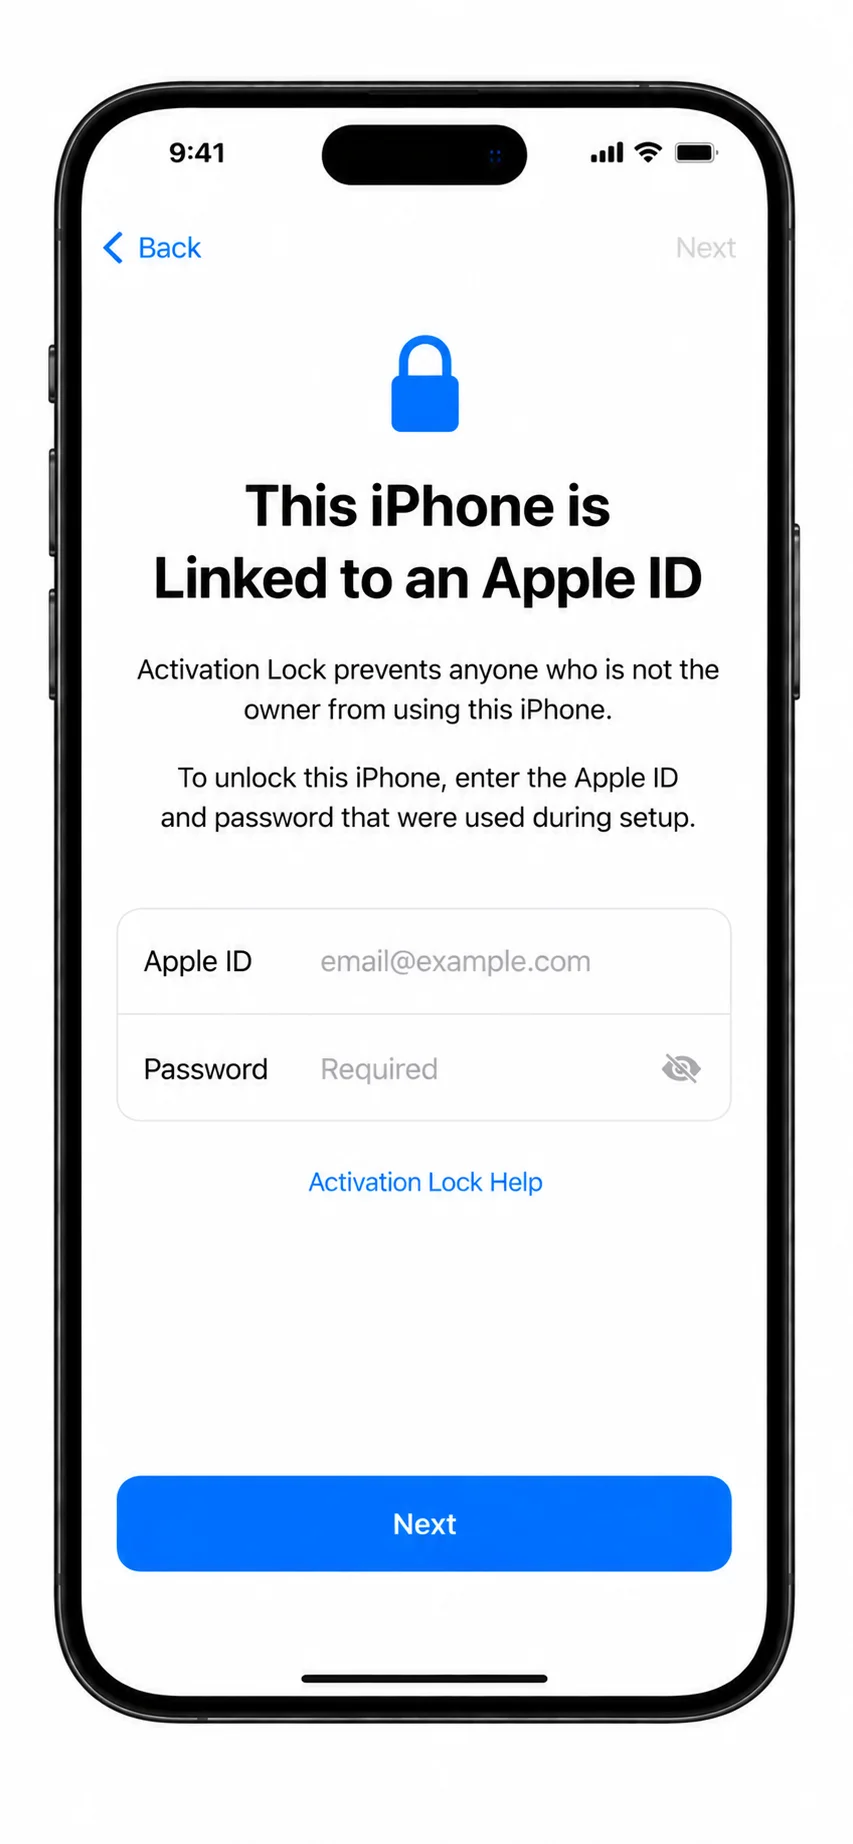
Activation Lock is the security feature that ties an iPhone to the owner’s Apple ID.
It turns on automatically when Find My iPhone is enabled. That is the setting people use to locate or lock a lost phone. The side effect is that once Activation Lock is on, the device stays linked to that Apple ID even after it is erased.
Apple Support describes this clearly, and MacObserver has covered it as both a security strength and a practical headache for used device buyers. The feature protects against theft. It also means a phone cannot be reactivated without the original owner’s credentials.
So if you buy a used iPhone and see a screen asking for an Apple ID and password after the erase, you are looking at Activation Lock.
There are only two legitimate ways out.
The first is to contact the previous owner and ask them to remove the device from their iCloud account. They can do this from their own iPhone by going to Settings, tapping their name, opening Find My, and turning off Find My iPhone. Or they can sign in at iCloud.com and remove the device from their account list.
The second option is to contact Apple Support with valid proof of purchase. If you have the original receipt showing the device’s serial number or IMEI, Apple may be able to remove the lock.
There is no third option. Not really.
Warning: Don’t Fall for Activation Lock “Bypass” Scams
You will find websites and services that promise to remove Activation Lock for a fee.
Some of them take your money and deliver nothing. Some deliver a partial workaround that breaks when the phone restarts. Some compromise your security or violate Apple’s terms. A few can leave the device in a worse state than before.
I am not saying every service is a scam. I am saying the only legitimate removal paths are the two I just listed.
No third-party tool can legitimately remove Activation Lock without either the original owner or Apple acting on proof of purchase. Anyone who tells you otherwise is selling something that does not work the way they claim.
This is not a small risk. People have spent money they could not get back and ended up with a phone they still could not activate. The safe path is simple. Contact the seller. Or contact Apple with your proof of purchase. Anything else is a gamble that is not worth taking.
If Your Used iPhone Shows a “Company Ownership” Screen (MDM/ABM)
There is another lock scenario that nobody talks about enough.
A person on Reddit recently described wiping a company-issued iPhone after a layoff and finding that the phone still showed a screen saying it was owned by the company. They could not provide the authentication it demanded. They asked whether they had a worthless brick.
They did not. But the fix was not what they expected.
This is a different problem from Activation Lock. It is MDM or ABM enrollment — mobile device management through Apple Business Manager. The company issued the phone and enrolled it in their management system. They did not properly release it when the employee left.
A factory reset does not fix this.
The company has to release the device from their Apple Business Manager console first. They need the serial number to do it. Some IT teams think removing MDM control is enough. It is not. The device stays enrolled in ABM until the organization explicitly releases it.
Once the company releases the device, you restore it using Apple Configurator on a Mac or iTunes on Windows. That clears the activation record. Then you can set it up like a normal phone.
If the company will not cooperate, the phone may not be usable on a personal account. That is the reality of a device that was never properly released.
I mention this because the user’s own language matters here. The Reddit person described the screen as saying the phone was “still owned by the company.” That exact phrasing is what someone sees on this kind of lock screen. If your used iPhone says something similar and asks for company authentication, you are not dealing with a standard Activation Lock. You are dealing with MDM/ABM enrollment. The solution is different.
The One Mistake Worth Avoiding
The most expensive mistake with a used iPhone is buying it without checking whether Activation Lock is removed.
Not checking is understandable. You trust the seller. Or you just want the deal. But the cost of finding out later is the whole price of the phone and nowhere to go from there.
Before you buy, ask the seller to show you the device with Activation Lock removed. Better yet, see the phone in person at the Hello screen with no Apple ID prompt. If the phone is still linked to someone’s account, walk away.
A clean used iPhone activates just fine. The process is simple. And a locked one has a clear path out — through the original owner or through Apple with proof of purchase.
Just not through the shortcuts that people sell online.
Switching from Android to iPhone? Here’s What’s Different
Most activation guides are written for people coming from another iPhone. They assume you have Quick Start. If you are on Android, Quick Start is useless to you.
And that is where the confusion starts.
You will see the Quick Start screen. It asks you to bring an old iPhone close to the new one. You do not have one. Do not keep trying to make it work.
Tap “Set up without another device”.
That is the specific path for Android switchers. It bypasses the Quick Start requirement and lets you continue with the standard activation flow. After that, the setup is the same as any other iPhone. You pick your language. You connect to Wi-Fi. You set your passcode.
But the data transfer part is different.
Apple has an app called Move to iOS. You install it on your Android phone before you start the iPhone setup. When the iPhone asks how you want to transfer data, you choose the option for Android.
The app transfers contacts. It transfers photos and videos if you have them stored locally. It moves messages where supported. It brings over your calendars and some Google account info.
It works. But it is not magic.
Apps you paid for on Android do not move to iOS. You have to buy them again if you want the iOS version. Some Android apps simply do not have an iPhone equivalent. You will find that out as you go.
If you used an eSIM on your Android phone, do not expect to scan the same QR code on the iPhone. Carriers usually need to reissue an eSIM when you switch platforms. The profile is tied to the device environment.
Ask your carrier for a fresh QR code or activation code before you start the iPhone setup. It saves you from stopping at the cellular screen and waiting for a support chat.
Once you reach the Home Screen, sign in to your Google apps. Mail, Photos, Drive. Then decide if you want iMessage and FaceTime turned on. Some people switching from Android prefer to keep those off at first until they sort out their contacts.
Moving from Android changes a few steps in how to set up iPhone. But the activation itself is still the same process. Connect to the internet. Sign in. Transfer what you can. And know that some things will not come with you. And if you are still weighing the switch itself, my honest iPhone vs Android comparison lays out both sides before you commit.
After You Reach the Home Screen: The Post-Activation Checklist
The Home Screen is not the finish line. It is the point where activation ends and the phone actually becomes useful.
Most people stop here. They tap around for a minute, see the icons, and assume everything is ready. It usually is. But there are a few quick checks that take five minutes and save you from finding out something is missing later.
I run through this list after every setup. You can too.
- Check for a software update. Go to Settings, then General, then Software Update. Install the latest iOS if one is waiting. It patches security holes and smooths out bugs you did not know you had.
- Look for a Carrier Settings update. Go to Settings, then General, then About. If your carrier has a settings update, a prompt appears. Accept it. Carrier Settings updates enable things like 5G, VoLTE, Wi-Fi Calling, and the right data settings for your network. You do not always see a notification about this. Checking manually takes ten seconds. Wi-Fi Calling is worth setting up properly once your line is active, and it takes about a minute — here is how to enable Wi-Fi Calling on your iPhone.
- Turn on Find My. Go to Settings, tap your name at the top, then Find My. Enable Find My iPhone. This is the feature that lets you locate, lock, or erase the phone if it is lost or stolen. Apple Support lists this as a core part of device security, and I have never set up a phone without it.
- Enable iCloud Backup. Go to Settings, tap your name, then iCloud, then iCloud Backup. Turn it on. Your phone backs up automatically when it is charging and connected to Wi-Fi. If you ever need to restore from a backup later, this is what makes that possible. Skip this and you are relying on luck.
- Check your number in Messages and FaceTime. Go to Settings, then Messages. Look under Send & Receive and make sure your phone number appears. Do the same for FaceTime. If your number is missing here, iMessage and FaceTime will not work properly for your contacts.
- Set up Apple Pay if you use it. Open the Wallet app. Add a card. The process is straightforward and you can do it in a few minutes. You can set up Apple Pay later too, but doing it now means you are ready when you need it.
- Configure Emergency SOS. Go to Settings, then Emergency SOS. Review the settings. You can set up emergency contacts and choose how the side button behaves in an emergency. I set this up on every phone I own. It is not something you want to figure out in the moment.
- Make sure your phone number actually works for the things you use it for. If you see SOS in the status bar instead of signal bars, your line has not connected yet — check why your phone says SOS before assuming the activation failed.
- Set up voicemail if your carrier requires it. Some carriers need you to set this up separately. Check with yours if you are not sure.
If you transferred data from an old iPhone, here is one more thing I want you to do. Keep the old iPhone for a few days. Do not wipe it right away. Go through your photos, contacts, messages, and apps on the new phone and confirm everything is actually there. Only then should you erase the old device.
I have seen too many people wipe too early and realize later that something did not transfer. Which is the whole point of waiting.
And if you set up an eSIM, you do not need to call your carrier to cancel the old SIM. Activation of the new eSIM automatically deactivates the previous SIM. Apple’s design handles that switch. No extra step from you. No double billing from the phone side.
The phone is activated now. These few checks make sure it is fully ready. And that distinction matters more than most people realize.
Quick Questions About iPhone Activation (FAQ)
These are the questions I hear most often. They match what people type into search and what they ask when they are stuck.
Can I skip setting up Face ID, passcode, and Apple ID and do it later?
Yes. Tap “Set up later in Settings” during setup, or choose “Don’t use passcode” when the phone asks for one. Your iPhone will activate and you will reach the Home Screen.
You can configure Face ID, your passcode, and your Apple ID from the Settings app afterward. I have done this myself when I wanted the phone working fast and did not want to deal with every step at once.
A couple of things will not work until you set them up. Apple Pay needs a passcode. App Store purchases need an Apple ID. If you skip these now, plan to come back and finish them.
Can I activate an iPhone without a SIM card?
If you have an eSIM-only iPhone, yes. The iPhone 14 and later in the U.S., the iPhone Air globally, and the iPhone 17 series in select markets have no physical SIM tray. They activate entirely with a digital eSIM.
If your iPhone has a SIM tray, you still need either a physical SIM or an eSIM for cellular service. You can use the phone on Wi-Fi without a cellular plan, but calls, texts, and mobile data require an active SIM or eSIM.
How can I activate my eSIM on my iPhone?
There are five methods, and which one works depends on your carrier.
Carrier Activation pushes the eSIM to your iPhone automatically. You see a “Finish Setting Up Cellular” notification and tap it.
You can scan a QR code from your carrier in Settings under Cellular, then Add eSIM, then Use QR Code.
You can enter the details manually if the QR code will not scan. You will need the SM-DP+ address and Activation Code from your carrier.
You can transfer an eSIM from an old iPhone using Quick Transfer. Go to Settings, Cellular, Add eSIM, then Transfer From Nearby iPhone. Both phones need iOS 18.4 or later for this to work.
And your carrier may have its own app that activates the eSIM through the app interface.
What is Activation Lock on iPhone?
Activation Lock is the security feature that ties an iPhone to the owner’s Apple ID.
It turns on automatically when Find My iPhone is enabled. After the phone is erased or reset, it demands the original owner’s Apple ID and password before it will activate again.
This is by design. Apple uses it to make stolen phones harder to use. For someone buying a used iPhone, Activation Lock is the most common reason activation fails.
The only legitimate ways to remove it are through the original owner or through Apple Support with proof of purchase.
Can I activate a used iPhone that’s locked to the previous owner?
Not by yourself. If the phone is still linked to the previous owner’s Apple ID, you need that person to remove it from their iCloud account.
They can do this from their own iPhone through Settings, their name, Find My, and Find My iPhone. Or they can sign in at iCloud.com and remove the device.
If you have the original proof of purchase, Apple Support may be able to remove the lock. Without either of those, there is no legitimate way forward.
Company-issued phones are a different situation. If the phone still shows a company ownership screen, the organization must release it from their Apple Business Manager before you can activate it personally.
Do I need Wi-Fi to activate my iPhone?
You need an internet connection. Wi-Fi is the most common way to get it.
The iPhone has to reach Apple’s servers to verify the device. Without a connection, activation cannot finish.
If you do not have Wi-Fi, you can use a mobile hotspot from another phone. Or you can connect the iPhone to a computer with a USB cable and activate it through Finder on a Mac or iTunes on Windows.
Some eSIM-only models in certain regions can activate using cellular data directly.
What do I do if my iPhone says “Unable to Activate”?
Check Apple’s System Status page first. Look for iOS Device Activation. If the box is not green, Apple’s servers are having issues and you should wait.
Then force restart the iPhone.
Then try a different Wi-Fi network. Or toggle Airplane Mode and try again.
If nothing moves, connect the iPhone to a computer. Activate it through Finder or iTunes. The computer contacts Apple’s servers directly and can finish the process when the phone could not.
If you see a password prompt during activation, Activation Lock may be enabled. That is a different problem and it is covered in the used iPhone section.
Most of the time, the problem is a server issue, a network problem, or a carrier mismatch. The phone is usually fine.
How long does iPhone activation take?
A few minutes in most cases. Once the iPhone connects to Wi-Fi and reaches Apple’s servers, activation is quick.
It takes longer if you are restoring from an iCloud backup or transferring data from an old iPhone. The time depends on how much data you are moving.
eSIM activation via QR code also takes just a few minutes.
iMessage and FaceTime can take up to 24 hours to fully register after setup. If those services say “Waiting for Activation,” that is normal in the first day.
Final Thoughts: Activation Is Usually Simpler Than It Feels
Activation feels bigger than it is when you are holding the phone and staring at the screen.
I know because I have watched people stress over this exact moment.
The process itself is solid.
Apple’s activation servers handle it every single day.
Thales reported over 400 million eSIM activations processed through their platform.
That is a massive amount of devices.
They go through the same basic flow without issue.
Most problems you hit have straightforward fixes.
A network switch. A restart. A computer connection.
You do not need to assume the worst.
I have given you the path for a new phone in the step-by-step walkthrough.
The troubleshooting section covers the stuck screen.
The used phone section handles the locked device situation.
The rest falls into place.
You know exactly what to do now.
And if it does not right away, you know where to look.